
JPG Forensic Analysis: Detecting Edits, AI Generation, and Recompression
A friend forwards you a screenshot of a price tag at a flea market. The seller has $40 written on it, the friend swears it said $400 yesterday. Or a marketplace listing photo shows a watch with a serial number that does not match the model. Or a viral image of a politician at an event you know they did not attend. Three different scenarios, one shared question: is the image evidence, or is it edited, or is it generated, and how do you tell without a forensic lab?
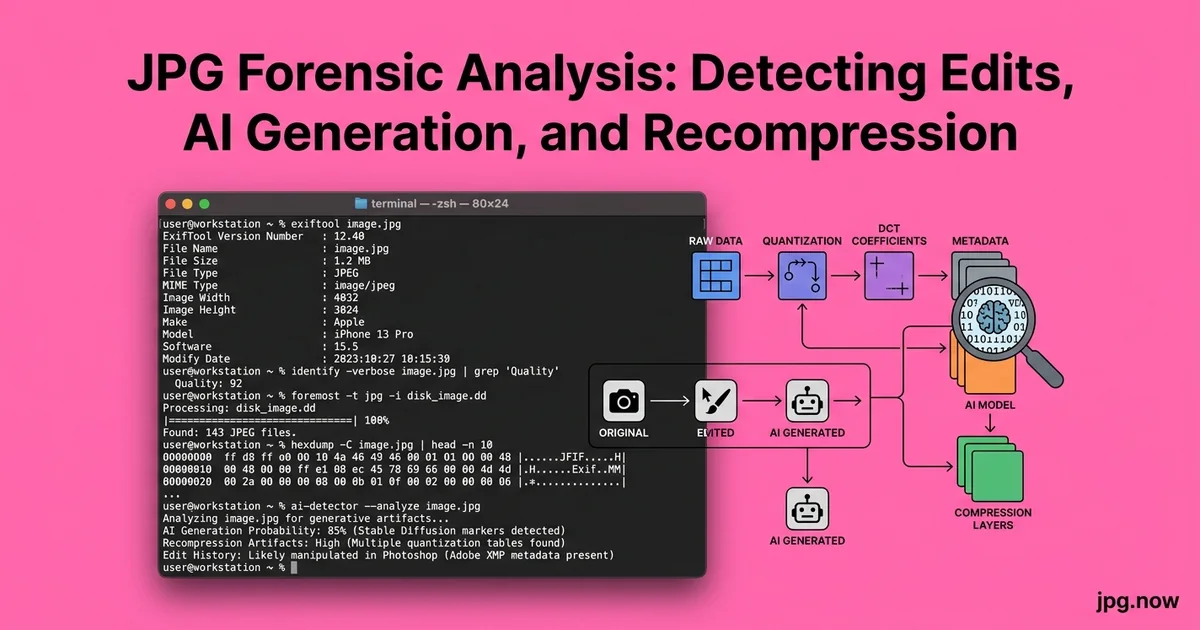
JPG forensic analysis is the practice of asking a single image three questions: has it been edited, was it generated by an AI model, and how many times has it been recompressed. The answers live inside the file structure itself in the quantization tables, the Huffman codes, the error-level signature, and the EXIF metadata that most editors leave behind. You do not need a lab or a subpoena to run these checks. Most of them work in a browser on a 200 KB image in under five minutes.
Why this matters now more than ever
Generative AI in 2026 produces images convincing enough to fool casual review, and the platforms that pass these images around (Twitter, WhatsApp, Telegram, Reddit) strip metadata aggressively, leaving fewer breadcrumbs than the same image would have had in 2019. The forensic toolkit has expanded to compensate: C2PA Content Credentials, improved Error Level Analysis (ELA), DCT-coefficient histograms, and AI-detection classifiers all exist as free or low-cost tools. None of them is a smoking gun on its own. Used in combination, they tell a coherent story in most realistic cases.
Step 1: Read the metadata before you do anything else
The cheapest tell is also the most reliable. Open the file in any EXIF viewer and look at the Make, Model, Software, and DateTimeOriginal tags. A genuine photo from an iPhone 15 Pro will show "Apple," "iPhone 15 Pro," and a capture date that matches the file modification date within a few seconds. A file processed through Photoshop carries "Adobe Photoshop 2026" in the Software field. A file generated by Midjourney typically has no camera tags at all, sometimes carries a "Midjourney" tag in the Comment field, and has a creation date that matches when the user downloaded it rather than any plausible capture moment.
Pull the full tag dump using the image info inspector. If the file shows no EXIF whatsoever, that is itself a signal most social platforms strip EXIF on upload, so the absence of metadata usually means the file came from Twitter, Instagram, Facebook, or a screenshot.
Step 2: Run an Error Level Analysis pass
Error Level Analysis (ELA) saves a copy of the JPG at a known quality (typically 90 or 95) and computes the per-pixel difference between the original and the resave. Regions that have been edited compress differently than the surrounding image, so they show up as brighter areas in the difference map. ELA is not a silver bullet it produces false positives on high-contrast edges, fails on heavily recompressed files, and tells you nothing about content that was added to an already-edited image. But it remains the fastest first-pass tool.
FotoForensics.com runs ELA in a browser at no cost. Sherloq is the desktop equivalent for Linux and macOS and adds 20+ additional analyses including noise residual and copy-move detection. For the casual case checking whether the price tag in a marketplace photo has been tampered with the browser tool is plenty.
Step 3: Examine the quantization tables
Every JPG encoder uses a quantization table that fingerprints which application created it. Adobe Photoshop's tables differ from those produced by the libjpeg-turbo defaults, which differ from Google's Skia encoder used in Android, which differ from Apple's CoreImage encoder used in iOS. A photo claimed to come straight from a Canon EOS R5 should carry Canon's quantization signature. If you instead find Photoshop's signature, the file has been opened and re-saved at least once.
The "jpeg-quality" tool from the libjpeg suite reports the estimated quality factor and table source. The Python library jpeginfo does the same from the command line. For a quick web-based check, the image comparison tool can sit two suspect files side by side at 1:1 zoom to surface block-boundary mismatches that point to splicing.
Step 4: Spot AI generation signatures
AI-generated JPGs have characteristic tells in 2026:
- Suspiciously clean noise floor in flat areas where a real camera sensor would produce shot noise
- High-frequency texture artifacts in hair, fabric, and foliage that look like a soft static pattern under 200 percent zoom
- Geometric inconsistencies in reflections eyes that catchlight from light sources not visible in the scene, sunglasses reflecting impossible objects
- Text and hands that almost work letters that read but are not English, fingers that bend at extra joints
- C2PA Content Credentials metadata, which legitimate AI providers including OpenAI, Adobe Firefly, and increasingly Midjourney now embed by policy
Check for the C2PA manifest directly using contentcredentials.org. The manifest, when present, tells you which model produced the image and when. Its absence does not prove the image is real many AI tools still strip it but its presence is dispositive evidence of synthesis.
Step 5: Detect recompression generations
A file that has been saved as JPG, opened, saved again, opened, and saved a third time develops a characteristic block-aliasing pattern. The 8x8 DCT grid begins to ring at boundaries, and the histogram of DCT coefficients develops gaps at specific frequencies. The "Double JPEG Detection" approach published by Lin, He, Tang, and Tang in 2009 remains the standard, and modern implementations including Sherloq's "JPEG Ghost" tool make the detection visual.
Run the file through the JPG compressor at several quality levels and compare the file size curves. A pristine first-generation JPG will produce a smooth, predictable compression curve. A file that has been compressed three times before reaching you will show step-like artifacts in the curve at the quality levels matching its previous encodes.
Step 6: Format provenance with the image converter
If a file claims to be a JPG but the byte structure suggests a different origin say, a PNG that was opened in Preview and exported to JPG, or a WebP renamed to .jpg the image converter can re-encode the file at a known quality and produce a clean reference copy. Comparing the metadata of the reference copy against the suspect file isolates which artifacts come from the supposed original processing and which come from the file's actual history.
Common forensic mistakes and how to avoid them
- Treating ELA brightness as proof of editing. High-contrast edges are also bright in ELA. Fix: combine ELA with metadata and quantization analysis before concluding.
- Assuming missing EXIF means manipulation. Social platforms strip EXIF by default. Fix: ask where the file came from before reading anything into metadata absence.
- Stopping at the first signal. A single suspicious indicator does not equal manipulation. Fix: build a story from at least three independent analyses before drawing a conclusion.
- Comparing a screenshot to an original. Screenshots destroy quantization signatures entirely. Fix: insist on the original file when investigations matter.
- Trusting C2PA absence. Many AI tools strip the manifest. Fix: C2PA presence is dispositive of synthesis; absence is uninformative.
- Re-saving the suspect file before analysis. Opening in Preview, Photoshop, or even some EXIF viewers can rewrite the file. Fix: work on a copy and treat the original as read-only evidence.
Three real-world cases worth knowing
The 2023 Pentagon explosion hoax. An AI-generated image of an explosion near the Pentagon briefly moved markets before being debunked. The forensic tells were clear: no plausible camera EXIF, characteristic AI-style smoothness in the smoke plume, and no matching ground-truth reports. The case is now a standard teaching example for journalism programs.
The "fake Trump arrest" Midjourney images, March 2023. Eliot Higgins of Bellingcat openly generated and shared the now-famous arrest images. The forensic signals were Midjourney-typical hand artifacts, smooth fabric textures, and impossible badge details visible at 200 percent zoom. The case prompted Midjourney to add stronger guardrails for public figures and later to embed C2PA manifests.
Bellingcat geolocation verification, ongoing. The open-source investigators at Bellingcat publish their forensic methodology routinely. Their workflow combines EXIF, reverse image search, geolocation via shadows and architecture, and JPG structural analysis. The Bellingcat playbook is the closest thing the field has to a public-domain standard.
Quick comparison of forensic tools
| Tool | Strength | Cost | Best for |
|---|---|---|---|
| FotoForensics | Browser ELA + metadata | Free | Quick first pass |
| Sherloq | 20+ desktop analyses | Free, open source | Deep investigation |
| ExifTool | Metadata extraction | Free | Tag inspection and audit |
| JPEGsnoop | Structural inspection | Free, Windows | Quantization fingerprinting |
| contentcredentials.org | C2PA manifest read | Free | AI provenance check |
| InVID WeVerify | Browser extension | Free | Journalist workflows |
| Hive AI / Optic | AI-image classifier | Freemium | Bulk screening |
Tools worth knowing
- FotoForensics browser-based ELA, metadata, and quantization analysis
- Sherloq open-source desktop forensic toolkit with 20+ analyses
- ExifTool the industry standard for metadata extraction
- JPEGsnoop Windows tool for deep JPG structure analysis
- contentcredentials.org C2PA manifest inspector
- InVID WeVerify browser extension that aggregates several forensic checks for journalists
Advanced techniques worth learning
- Noise residual analysis in Sherloq surfaces splicing by comparing sensor noise patterns across regions of a single image.
- Reverse image search via Google, Yandex, and TinEye is still the highest-yield first move when the question is "did this image exist before today?"
- Shadow geometry from multiple light sources in a scene must mathematically agree on sun position. AI generators routinely violate this constraint.
- Catchlight reflections in eyes reveal off-camera light sources in real photographs. AI catchlights are often subtly wrong or symmetrically perfect across both eyes.
- Compression bracket testing run the file through the JPG compressor at qualities 70, 80, 85, 90, 95 and chart file size. Step transitions indicate prior compressions.
- Cross-platform metadata audit upload a known-clean test file to the same platform the suspect came from. Compare how the platform strips and rewrites tags so you can subtract platform effects from the analysis.
- Pixel-level copy-move detection available in Sherloq and several academic tools, identifies regions duplicated within a single image, which is a common technique for hiding or multiplying objects.
What forensic analysis cannot do
It cannot prove an image is unedited only flag artifacts that suggest editing. It cannot reliably distinguish a heavily compressed real photo from an AI generation when both have passed through Twitter or WhatsApp, because the platform compression homogenizes the signal. And it cannot recover the original file once it has been screenshotted and recropped; screenshots destroy the original quantization signature entirely.
The 15-minute analysis checklist
- EXIF metadata pulled and reviewed
- ELA pass run, edited regions noted
- Quantization tables fingerprinted
- AI signature checks completed including C2PA
- Recompression curve sampled
- Reference re-encode generated for comparison
Frequently asked questions
Can I do meaningful forensic analysis on a screenshot?
Limited. Screenshots destroy the original quantization signature and EXIF. You can still spot visible artifacts hands, text, impossible lighting but structural analysis is mostly out. Push for the original file whenever the stakes warrant it.
How reliable are AI-detection classifiers like Hive or Optic?
Moderately reliable on uncompressed, full-resolution outputs from the major generators. Reliability drops sharply on heavily recompressed images, screenshots of AI outputs, and outputs that have been re-edited in a photo editor after generation. Use as one signal among several.
What does it mean if a file has no C2PA manifest?
Almost nothing. The manifest is opt-in for most tools and gets stripped by most platforms. Presence is strong evidence of AI origin; absence is uninformative.
Can I forensically analyse an image embedded in a PDF?
Extract the image first using the PDF to JPG converter or a similar extractor. PDF embedding usually preserves the image bytes so the analysis remains valid; sometimes the PDF compresses or recodes, in which case treat the extracted image as a second-generation file.
What is the single biggest red flag for AI generation in 2026?
Combined: unnatural noise floor in flat areas plus subtly wrong fine detail (hair, hands, text) plus no plausible camera EXIF. Any one alone is weak; the combination is strong.
Does converting between formats erase forensic evidence?
Yes, partially. Running a file through the image converter re-encodes it and adds a new quantization signature on top of the old one. Analyse first, convert later.
How long should a casual forensic check take?
For a single image with a clear question, 5 to 15 minutes covers EXIF, ELA, quantization, AI check, and reference re-encode. Deeper cases noise residual, copy-move, shadow geometry can take an hour or more per image.
Building a personal forensic playbook
The investigators who answer image-authenticity questions consistently are not the ones who memorise every analysis technique; they are the ones who codify a personal checklist and run it the same way every time. A simple playbook looks like this: open file with the image info inspector, screenshot the EXIF, run FotoForensics ELA, screenshot the result, do a reverse image search on Google and Yandex, screenshot the top hits, check C2PA at contentcredentials.org, screenshot the result. Now you have a five-screenshot evidence package on every suspect image in under ten minutes. The screenshots themselves become the audit trail if the question ever escalates to a legal or editorial review.
Keep these playbooks in a Notion or Obsidian vault organised by case type: marketplace fraud, deepfake claims, AI-generation suspicion, edited evidence. Each playbook lists the techniques in priority order and the thresholds at which results become meaningful. Iterate the playbooks every time you run into a case that the existing recipe did not cover.
How platforms affect forensic analysis
Every social platform applies its own transformations. Twitter strips EXIF aggressively and recompresses to JPG quality 70 to 80. Facebook resizes to a max long edge of 2,048 and reapplies its own quantization tables. WhatsApp recompresses heavily and downsizes for mobile delivery. Instagram strips EXIF and applies sRGB conversion. Telegram is unusual in often preserving more original data when the user shares as a file rather than as a photo. Knowing the platform of origin lets you subtract platform effects from your analysis and isolate what damage came from the platform versus what came from manipulation.
If the question is "did this person edit this image" and the image came from WhatsApp, the honest answer is often "structural analysis is impossible because WhatsApp obliterated the original quantization signature." Push for the file as originally shared via a file-preserving channel before accepting a forensic question.
Working with deepfake video frames
Deepfake video has become the more pressing problem in 2026, and forensic analysis of individual frames extracted from suspect video uses the same techniques as still-image analysis with two additional considerations. First, temporal consistency: a deepfake that swaps a face frame by frame typically shows subtle inconsistencies in pixel-level noise between consecutive frames, visible when you compare frames N and N+1 at 200 percent zoom. Second, encoding artifacts: video codecs apply their own compression, so the per-frame JPG export carries both the codec's signature and any deepfake processing artifacts on top.
Extract frames at the original resolution (not screenshot resolution) using ffmpeg with -q:v 2 for highest-quality JPG output. Then run the standard forensic playbook against the extracted frames. The image info inspector and compare tool handle frame-level analysis once extracted.
Standards bodies and ongoing developments
The C2PA (Coalition for Content Provenance and Authenticity) standard continues to gain adoption in 2026 with participation from Adobe, Microsoft, the BBC, the New York Times, Sony, and Nikon. The standard defines cryptographically signed manifests that travel with the image and document the chain of custody from capture through editing. Nikon and Sony now ship cameras (Z9 and A1 II respectively) with C2PA capture built in; the BBC and NYT use C2PA in production newsrooms; Adobe Firefly embeds manifests on every output.
For forensic practitioners, knowing how to read C2PA manifests is now a baseline skill. The c2patool reference implementation and contentcredentials.org both expose the manifest contents. The cryptographic signatures provide much stronger evidence than any heuristic forensic analysis when present; absence remains uninformative.
JPG forensics is less about a single smoking gun than about accumulating evidence across multiple analyses until one story explains everything. Start your next investigation by dropping the file into the image info tool and the compare tool in parallel. Five minutes of structured looking will tell you whether the image deserves another hour of deeper analysis. For format conversions and clean reference re-encodes, the image converter, PNG to JPG, WebP to JPG, and HEIC to JPG tools cover the most common inputs.