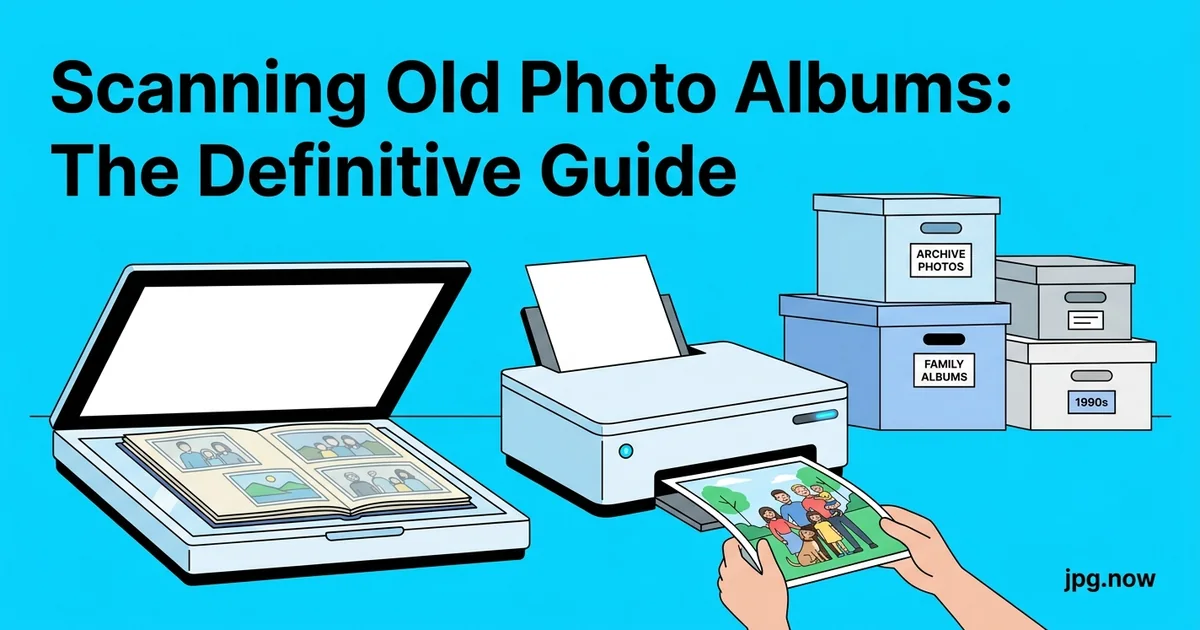
Scanning Old Photo Albums: The Definitive Guide
Your grandmother is 91. She still sharp, still tells the stories, still knows which cousin married which neighbor in 1962. But last month her hand shook when she was pointing at a photo, and you realized that the album in her lap had three pages where the glue had finally given out and four prints had drifted loose into the bottom of the binder. The albums are the most fragile artifacts in her house, and the person who knows what is in them is finite. Digitization is not a someday project. It is a now project, this Saturday, while you both still can.
The prints from 1968 are already 30 percent faded, the album glue is yellowing the back of every image, and the magnetic-page albums from the 1980s are slowly destroying everything inside them. Digitization is not optional. It is triage. This guide is the definitive walkthrough for getting albums into digital form before another decade passes, with scanner recommendations that match your album type, resolution targets that ignore the marketing math, and the metadata workflow that turns 4,000 scans into a searchable archive.
Background: how album materials destroy photos
Three album types account for 90 percent of home archives, each with its own degradation pattern. Magnetic-page albums (popular 1975-1995) use an adhesive that yellows and migrates into the photo emulsion. Black-paper albums with photo corners are gentler on the prints but the paper itself is highly acidic and accelerates fading. Plastic-sleeve albums (1990s-present) trap moisture and outgas plasticizers that fog the surface.
Color prints from 1965-1985 used Kodak EP-2 chemistry, which is the worst archival print process ever sold. The magenta dye fades fastest, leaving the characteristic cyan-green cast on every face. By 2030, most untreated prints from this era will be unreadable.
The four scanning approaches, ranked
You have four practical options, each with different speed, quality, and cost trade-offs.
- Flatbed scanner: Best quality, slowest speed, $150 to $500 for an Epson V600 or V850. Scans up to 600 ppi for prints, 4,800 ppi for negatives.
- Sheet-feed photo scanner: Best speed for loose prints, $300 to $600 for an Epson FastFoto FF-680W. Up to one print per second at 300 ppi, both sides at once.
- Smartphone scan app: Cheapest, lowest quality. Google PhotoScan and Microsoft Lens are free; produces 8 to 12 megapixel scans with glare correction.
- Professional service: Highest cost, zero effort. ScanCafe, ScanMyPhotos, and Legacybox charge $0.30 to $1.00 per print plus shipping.
Step-by-step: from album to archive
- Inventory the albums. Count albums, estimate prints per album, note album type (magnetic, paper, sleeve).
- Choose the scanning approach per album. Magnetic pages cannot come out, so flatbed. Loose prints in sleeves come out, so sheet-feed.
- Set scanner resolution. 600 ppi for prints, 2,400 to 4,000 ppi for slides and negatives.
- Save as TIFF master, JPG sidecar. Use the JPG to TIFF converter if your scanner outputs JPG only.
- Color-correct the faded prints. Auto-correct in Lightroom or Photoshop fixes most cyan-shift fade.
- Tag metadata while you scan. Filename, year, event, people. Capture context in real time.
- Build a multi-page PDF per album. Use the JPG to PDF converter for relative sharing.
- Back up to two destinations. Home archive plus cloud, immediately, not later.
Match the method to the album type
Magnetic-page albums require flatbed scanning because you cannot remove the prints without tearing them. Slide the entire page onto the flatbed, scan at 600 ppi, then crop the individual photos in software. Album pages with prints under polypropylene sleeves can come out for sheet-feed scanning. Pull a print, scan, return to sleeve. Glassine-paper interleaved albums are sheet-feed candidates.
For loose snapshots in a shoebox, sheet-feed scanning is 20 times faster than flatbed and produces equivalent quality at typical 300 ppi snapshot sizes.
Resolution targets that actually matter
For a standard 4x6 snapshot you intend to view on screen or reprint at original size, 300 ppi is sufficient. For 4x6 prints you may want to enlarge to 8x10 or 11x14, scan at 600 ppi. For slides and negatives, the original is much smaller than the final viewing size. Scan at 2,400 ppi minimum, 4,000 ppi for anything you may want to enlarge.
Bigger is not always better. A 600 ppi scan of a 4x6 produces a 2,400x3,600 file at 6 MB JPG; a 1,200 ppi scan produces a 24 MB file with no visible benefit because the print itself does not contain that much detail.
Scanner comparison for home archive use
| Scanner | Type | Best for | Speed | Price |
|---|---|---|---|---|
| Epson FastFoto FF-680W | Sheet-feed | Loose prints, batches | 1 print/sec | $600 |
| Epson V600 | Flatbed | Albums, slides, negatives | 30 sec/page | $280 |
| Epson V850 | Flatbed | Medium-format, archival | 45 sec/page | $1,200 |
| Canon CanoScan 9000F | Flatbed | Mixed prints and film | 40 sec/page | $220 |
| Google PhotoScan | Phone app | Quick captures | 30 sec/photo | Free |
| ScanCafe service | Mail-in | Hands-off bulk | 4-6 weeks turnaround | $0.39/scan |
File format: scan to TIFF, deliver JPG
Save the master scan as TIFF, uncompressed, no quality loss, preserves every bit for future re-edits. Generate a JPG sidecar from each TIFF for daily viewing and sharing. The TIFFs go on your archival drives and never get touched again. The JPGs travel.
If your scanner only outputs JPG, set quality to maximum (100 in Epson Scan, "Best" in most consumer apps). For sharing scans by email or upload, run the JPGs through the JPG compressor to drop email-size attachments without re-touching the masters.
Post-scan corrections that transform 1970s prints
Faded color prints from the 1960s and 1970s suffer from cyan shift. The magenta layer faded faster than cyan and yellow, leaving a green-blue cast on every face. Auto-correction in Lightroom or Photoshop Elements fixes this in one click for most prints. Dust and scratch removal works well at this scan resolution because the artifacts are large relative to the image.
For severe damage, AI tools have gotten remarkably good. Topaz Photo AI and Adobe's Neural Filters handle scratch repair, face restoration, and noise reduction that would have taken hours manually in 2018. For final touch-ups, the photo editor handles spot fixes and crop adjustments.
Real-world scanning examples
The "Grandma Saturday" project. 4 magnetic-page albums, 240 prints total, scanned on an Epson V600 over a single afternoon while Grandma sat next to the scanner and told stories. Each scan got tagged immediately with names and approximate years from her recollection. Total time: 6 hours. Storage: 8 GB of TIFFs, 1.2 GB of JPG sidecars.
The shoebox. 1,800 loose snapshots from a deceased aunt's estate, scanned on a borrowed Epson FastFoto over two evenings. Total time: 4 hours including loading. Output: 12,000 scans (both sides captured), 32 GB total.
Slides from a family member's photography hobby. 800 35mm slides from 1965-1990, professional scan service at $0.69 each plus shipping. Total cost: $620. Turnaround: 4 weeks. Quality: 4,000 ppi scans with manual dust removal.
Organize as you scan, not after
The biggest mistake is dumping 4,000 scans into a single folder and promising to organize "later." Later never comes. Scan one album at a time, name the folder by year and event, and stop. Re-shuffling 4,000 files into folders is a Saturday you will never get back.
Building a multi-page PDF for sharing
For sharing a complete album with relatives, a multi-page PDF beats a folder of JPGs every time. One file, one email, no zip-extraction confusion for the technically uncomfortable. Export the scanned JPGs to a single PDF using the JPG to PDF converter. Set page size to letter or A4, add a title page, and the result fits in any email under 25 MB after compression.
For very long albums (200+ photos), split into chapters by year or event to keep individual PDF files under 50 MB. Multiple smaller PDFs are easier for recipients on mobile devices and slow connections than one monster file.
Handling damaged or torn photos
Before scanning, gently flatten curled prints under a heavy book overnight. Do not attempt to remove tape or remount damaged albums; the act of removal often does more damage than the original wear. For torn corners, scan the print intact and reconstruct the missing piece in software using Photoshop's Generative Fill or Topaz Photo AI's restoration mode.
Water-damaged prints with bleeding ink require specialist conservation. A local art conservator or photo archivist (often affiliated with regional museums) can advise. For the home archive, scan at maximum resolution before any further degradation, save the TIFF master, and treat the digital copy as the primary archive.
Working with the family historian
The most valuable hour of any digitization project is the hour spent with the oldest living family member identifying who is in each photo. Set the laptop on the table, project the scans onto a TV if possible, and ask open-ended questions: "Tell me about this one. Who is that? Where was this taken? What do you remember about this day?"
Record the conversation with your phone (with permission). Six months from now, transcribing the audio captures stories you would otherwise forget. The transcription becomes a permanent companion document to the photo archive.
What to do with negatives and slides
Negatives and slides hold dramatically more detail than the prints made from them, often 4 to 8 times more. If you have the negatives, scan them at 2,400 to 4,000 ppi rather than the prints. The result is closer to what the photographer originally saw. An Epson V600 with its transparency unit handles 35mm strips and mounted slides; the V850 adds medium-format support.
Common scanning mistakes
- Scanning at too low resolution. Cannot retroactively add detail. Scan high once, downsize forever after.
- Saving as JPG only. No master to re-edit. Always TIFF for the master.
- Skipping color correction. Cyan-shifted 1970s prints look terrible without auto-correct.
- Removing photos from magnetic albums. They tear. Scan the whole page through glass instead.
- Putting off metadata. The 30 seconds during the scan is worth 5 minutes a year from now.
- Not testing the backup. Verify you can open scans from the cloud copy, not just the original drive.
Advanced tips for archival-grade scans
- Clean the scanner glass between batches. A microfiber and isopropyl alcohol wipe every 50 scans prevents dust streaks.
- Wear cotton gloves with old prints. Skin oils accelerate fading on prints from the 1960s.
- Use the scanner's color profile. Epson Scan supports IT8 calibration targets for color-accurate scans.
- Crop conservatively. Include a 1mm border around the print edge for context.
- Capture the back of every print. Handwritten notes on the back are often the only metadata that exists.
- Run OCR on scanned text-bearing photos. The image to text tool extracts handwritten captions and dates.
- Standardize filenames. YYYY-MM_event_001.tif sorts chronologically and survives software changes.
FAQ
How long does it take to scan a typical family album?
A 50-photo magnetic-page album takes about 90 minutes on a flatbed (60 seconds per page including positioning, plus crop time). The same 50 prints loose go through a sheet-feed scanner in 5 minutes.
Is it worth scanning photos that are already digital backups of prints?
Only if the existing digital copies are below 1,200 pixels on the long edge. Anything 2,000+ pixels is sufficient for screen viewing and modest reprints.
What about Polaroids?
Polaroids scan on a flatbed at 600 ppi. The plastic surface picks up reflections, so reduce ambient light during scanning. Cover the polaroid corners with paper if the chemistry has yellowed.
Should I scan and discard the originals?
No. Keep the physical prints in acid-free archival boxes. Digital and physical complement each other; one is searchable and shareable, the other is the irreplaceable artifact.
Are AI restoration tools worth the cost?
For the most damaged or most important 50 photos, yes. Topaz Photo AI at $200 one-time pays for itself if you have a dozen photos worth restoring. For the other 95 percent of scans, basic auto-correction in Lightroom is sufficient.
Can I get my scans printed back as photos?
Yes, and modern prints will outlast the originals. Mpix, Shutterfly, and your local pro lab all accept TIFF or JPG uploads. For prints that will be displayed, use the DPI converter to confirm 300 ppi at print size.
Should I use a service or do it myself?
Under 200 prints: yourself. Over 1,000 prints: service. In between: depends on how much you value the storytelling time with the family member who knows the photos. Sitting next to Grandma while you scan is itself the project.
Compression for sharing without losing the master
Once the TIFF masters are safe, generate sharing copies by running the JPGs through the image compressor. A 600 ppi TIFF master might be 25 MB; the sharing JPG can be 800 KB without visible loss at typical viewing sizes.
The "scan first, sort later" exception
There is one case where dumping everything and sorting later is correct: when the person who knows the names and dates is elderly and time is the constraint. Scan the whole album fast, sit down with the family historian, point at the screen, and let them tell you who that is. Record the conversation as audio if they will allow it. The metadata you capture in 30 minutes will be impossible to reconstruct after they are gone.
This is also the case where smartphone scanning apps shine. Lower quality, much higher speed, captured in the moment the storyteller is willing to tell stories. You can rescan at flatbed quality next month from the physical originals; you cannot re-record the explanation later.
Color restoration for badly faded prints
The classic 1970s color print magenta-faded into cyan-green is the most common restoration job for home archives. Lightroom's "Auto" white balance and tone fixes 70% of cases. For stubborn fades, the workflow: open in Photoshop, Image > Adjustments > Auto Color, then Image > Adjustments > Curves, sample a known neutral point (white shirt, gray sky) and click "set gray point" on the eyedropper. Two clicks restore most prints to near-original color.
For severe damage (water stains, tears, missing chunks), Topaz Photo AI and Adobe Photoshop Generative Fill can reconstruct realistic detail. Worth $200 license cost for any archive with 50+ heavily damaged prints.
Building a multi-generational sharing library
Once scans are clean and tagged, the question becomes: how do you share with relatives? Shared cloud folders work but require everyone to have the same cloud account. Multi-page PDFs sent by email work universally. Physical reprints into modern albums work for the technologically resistant. A combination is best: PDFs to the digitally-fluent, printed books to grandparents.
For multi-page PDFs of scanned albums, the JPG to PDF converter creates albums that anyone can open and view. Add a title page, organize chronologically, and include captions. The result feels like a published book in PDF form.
Start with one album this weekend
Pick the most important album, usually the oldest one, and scan it cover to cover. Save TIFF masters, generate JPG sidecars, build a PDF with the JPG to PDF converter for emailing, and compress sharing copies with the JPG compressor. One album done well is worth 10 half-finished projects. For ongoing maintenance, pair the workflow with the image info tool for metadata checks and the photo editor for spot color fixes. For high-quality color restoration on damaged prints, use the AI upscaler to recover detail before refinement. See the tools directory for the complete scanning workflow kit.