WordPress Image Optimization: Plugin vs Server-Side
A friend of yours runs a recipe blog on WordPress. She emails you because pageviews are flat despite traffic growing and she just got a Search Console notification that 71 percent of her URLs are failing Core Web Vitals. You ask her to send a screenshot of her plugins list. There are four image-optimization plugins installed simultaneously: Smush, EWWW, Imagify free, and a deactivated copy of ShortPixel. None of them are configured. The bulk-optimize button has never been clicked on any of them. The 9,400 images in her media library are still raw exports from her DSLR. This is more common than you would think.
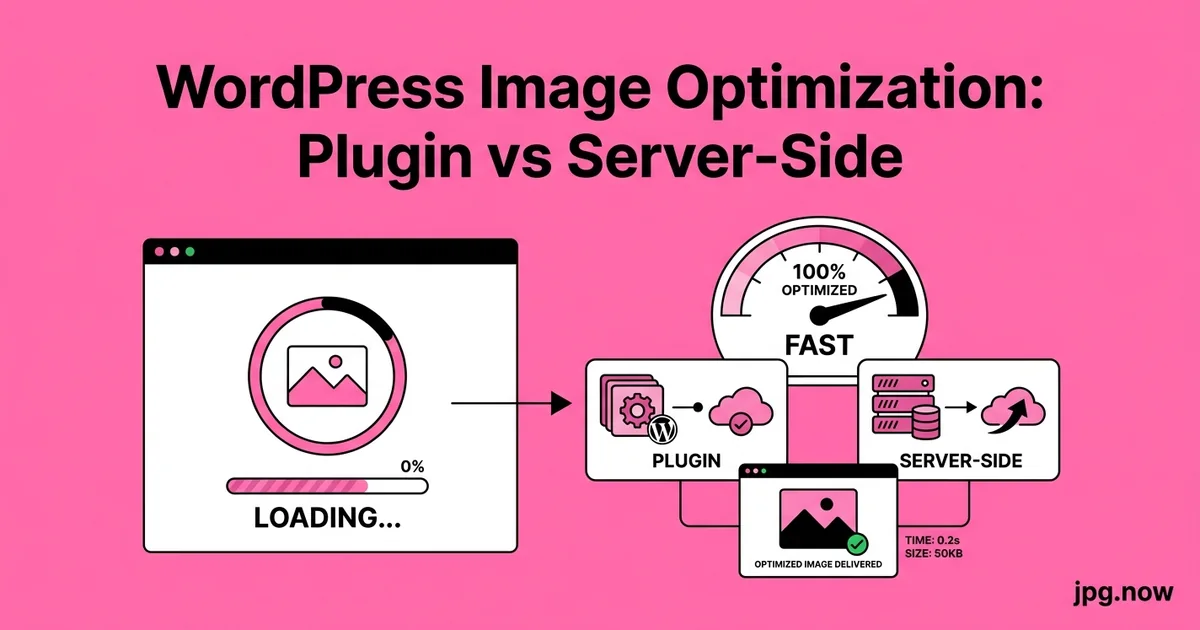
The WordPress image-optimization plugin market is crowded, confusing, and often misleading about what each tool actually does. EWWW, Smush, Imagify, ShortPixel, and Optimole all promise faster pages, smaller files, and better Core Web Vitals scores. Some deliver. Some redirect the optimization to their own servers in ways that fail under load. And in a meaningful set of cases, doing the optimization server-side or in your build pipeline is simply better than any plugin. Here is the honest tradeoffs guide.
Background: what the plugins actually do
All five plugins offer some combination of these features:
- Recompress JPG and PNG files in your media library
- Convert JPG and PNG to WebP (and sometimes AVIF) and serve the modern format conditionally
- Resize oversized uploads to a maximum dimension
- Lazy-load images below the fold
- Strip EXIF metadata to save bytes
What differs is where the work happens, how aggressive the defaults are, and what they charge for. Some plugins do the work locally on your server; others phone home to their own optimization API; a third group operates as image CDNs and rewrite image URLs entirely.
Smush (WPMU DEV)
The most-installed plugin in the category. The free version does lossless compression locally on your server — fine, but the file-size savings are modest (typically 10 to 20 percent). The paid Smush Pro adds lossy compression, WebP conversion, and CDN delivery, with optimization happening on WPMU DEV's servers.
Best for: Sites with small media libraries that want a no-config option.
Avoid if: You have a 10,000-image library — the initial bulk-optimize will take days and may time out repeatedly.
EWWW Image Optimizer
The most configurable. Free version runs locally using PHP image libraries. Paid version offloads to EWWW's API for better compression and WebP conversion. EWWW exposes more knobs than the others — JPG quality, PNG color depth, GIF interlacing — which is good if you know what you are doing and overwhelming if you do not.
Best for: Developers who want fine control and are willing to read documentation.
Avoid if: You want sensible defaults with no thinking.
Imagify
Made by the WP Rocket team. Three compression levels (Normal, Aggressive, Ultra) with clear visual previews. Cloud-based optimization with a monthly quota. WebP conversion is included on all paid plans. The UI is the cleanest in the category.
Best for: Site owners who want a simple "set quality level, click optimize" workflow.
Avoid if: You exceed the quota — overages are expensive and quotas reset slowly.
ShortPixel
Often produces the best raw compression results in head-to-head tests, particularly for PNG. Three modes (Lossy, Glossy, Lossless). Includes AVIF support, smart cropping, and an adaptive media-delivery CDN as a separate product. Pricing is by credit rather than monthly subscription, which suits one-time bulk optimization jobs.
Best for: Sites where image quality matters more than convenience.
Avoid if: You want all-you-can-optimize pricing — the credit model gets expensive at scale.
Optimole
Unlike the others, Optimole is a real-time image CDN. You install the plugin and it rewrites image URLs to point at Optimole's edge, which compresses, converts, and resizes on the fly. No bulk optimization step — every image is optimized when first requested.
Best for: Sites that cannot tolerate a bulk-optimize maintenance window or have constantly changing media.
Avoid if: You want full control over your assets — if Optimole goes down, your images go with it.
Plugin comparison at a glance
| Plugin | Local vs API | WebP | AVIF | Bulk speed | Pricing model |
|---|---|---|---|---|---|
| Smush | Local (free) / API (Pro) | Pro only | No | Slow | Subscription |
| EWWW | Local + optional API | Yes | Pro only | Medium | Subscription / pay-as-you-go |
| Imagify | API | Yes | 2026 paid plans | Fast | Quota subscription |
| ShortPixel | API | Yes | Yes | Fast | Credit-based |
| Optimole | CDN (real-time) | Yes | Yes | N/A (on-demand) | Visit-based |
Step-by-step: choosing and configuring the right approach
- Audit your media library size. Under 1,000 images: any plugin works. 1,000 to 10,000: API-based plugins win. Over 10,000: consider server-side or CDN.
- Check hosting capability. Shared hosting often blocks long-running PHP processes, breaking local optimization. Pick API-based.
- Decide on quality tolerance. Photo blogs: glossy/normal mode. Catalog sites: aggressive is fine.
- Enable WebP at minimum, AVIF if available. The Core Web Vitals impact is the headline benefit.
- Backup before bulk-optimize. Some plugins overwrite originals; some keep them. Confirm before clicking.
- Bulk-optimize overnight. Set the job running before bed; check completion in the morning.
- Verify a sample via image info to confirm the output matches expectations.
- Monitor Core Web Vitals in Search Console for 28 days to see field data shift.
The server-side alternative
If you have shell access to your server (a VPS, not shared hosting), you can do the entire job without any plugin:
- Run
imageminorsharpin a build script or cron job overwp-content/uploads - Convert all JPGs to WebP with a one-liner:
for f in *.jpg; do cwebp -q 82 "$f" -o "${f%.jpg}.webp"; done - Add Nginx or Apache config that serves .webp when the browser accepts it
- Use the JPG compressor for one-off optimizations on new uploads
This approach is roughly free, more reliable, and gives identical user-facing results. The downside is that non-technical site owners cannot maintain it, and any plugin update or new upload needs the script re-run.
Where plugins genuinely beat server-side
- Hands-off operation. A client who calls when "the photos look weird" needs a UI, not a cron job.
- Conditional WebP serving without rewriting htaccess. Plugins handle the
<picture>tag insertion automatically. - EXIF rotation handling. Plugins normalize the EXIF orientation flag during upload, which server-side tools sometimes get wrong.
- Bulk optimize without SSH. If you do not have shell access, plugins are the only option.
Where server-side genuinely beats plugins
- Build-time optimization. A static-site generator or headless WordPress build can optimize images once at deploy time and ship the optimized output via CDN, beating any runtime plugin.
- Predictable costs. No quota, no overage, no recurring fee.
- Multisite. Optimizing 40 subsites with a plugin means 40 plugin licenses; with a script it is one cron job.
- Avoiding third-party dependencies. If WPMU DEV or Imagify go offline, sites that rely on their CDN go with them.
Common mistakes and how to fix them
- Mistake: installing multiple optimization plugins simultaneously. Fix: deactivate all but one; they conflict on the WebP rewrite rules.
- Mistake: bulk-optimizing without a backup. Fix: snapshot the uploads directory before clicking.
- Mistake: leaving "preserve originals" off to save disk space. Fix: keep originals — you will want them for re-encoding when AVIF supplants WebP.
- Mistake: setting quality at 60 to maximize savings. Fix: target 78-82 for photos; below 70 produces visible artifacts.
- Mistake: assuming CDN-based plugins also resize. Fix: verify the plugin generates srcset; some only convert format, not dimensions.
- Mistake: trusting the plugin's "savings" number. Fix: spot-check actual file sizes via image info; some plugins inflate the percentage by comparing against a synthetic baseline.
Real-world examples
The Spruce Eats migrated from Smush to a build-time pipeline in 2024 after their bulk-optimize jobs began timing out on a 220,000-image library. Result: 28 percent additional savings and elimination of a $99/month plugin license.
WPBeginner uses Optimole with their existing CDN. The lazy-load and real-time conversion accounts for a measured 1.1-second LCP improvement on category pages without any media-library migration.
A regional news publisher (anonymized at their request) ran A/B testing across ShortPixel and Imagify on identical traffic for 30 days. ShortPixel produced 4 percent smaller files; Imagify produced 12 percent faster CrUX LCP numbers due to better serving infrastructure. They kept Imagify.
What to actually do
For most small-to-medium WordPress sites in 2026: install ShortPixel or Imagify, set quality to "Aggressive" (Imagify) or "Glossy" (ShortPixel), enable WebP conversion, enable AVIF if available, and bulk-optimize the library overnight. Monitor Core Web Vitals in Search Console for 30 days to see the LCP improvement land in field data.
For larger or more technical sites: skip the plugin, build an image-optimization step into your deploy pipeline, and use the image converter for one-off conversions or sanity checks. Use JPG to WebP to spot-check that your build output matches what a known-good converter produces.
Advanced tips
- Schedule bulk-optimize during low-traffic hours to avoid timeouts and CPU spikes.
- Disable plugin lazy-loading if you use native
loading="lazy"; double-lazy can defer above-fold images. - Use
wp media regenerateWP-CLI after bulk-optimize to rebuild thumbnails from the optimized originals. - Run Compress JPG on a new upload as a sanity-check reference before changing plugin quality settings.
- Add
X-Content-Encoded-Byheader to verify which plugin is serving each image. - Monitor cumulative byte savings via PageSpeed Insights' "deliver in next-gen formats" audit.
- Set a max upload dimension (e.g. 2500 px) at the plugin level so editors cannot ship 8 MP originals.
FAQ
Do I need a plugin if I am on Kinsta or WP Engine?
Both hosts offer image optimization as a host-level feature. A plugin can be redundant.
Will optimizing break my media URLs?
No, plugins keep the URLs and serve WebP via conditional rewrite. URLs only change if you switch CDNs.
Can I roll back a bulk-optimize?
Only if "preserve originals" was on. Otherwise you need to restore from backup.
Does Smush free do AVIF?
No, AVIF is a Pro-only feature on Smush in 2026.
How long does bulk-optimize take?
Local: roughly 1 image per second. API: 5-10 per second. CDN: instant on first request.
What quality should I set?
78-82 for JPG, 75-80 for WebP, 65-75 for AVIF. Below 70 risks visible artifacts.
Can I switch plugins later?
Yes — deactivate the old one, install the new one, re-run bulk-optimize. Keep originals to allow rollback.
The compression-quality sweet spot
Regardless of which approach you choose, the right JPG quality target for web images is 78 to 85. Below 78 you start seeing visible artifacts on smooth gradients. Above 85 you are wasting bytes. WebP at quality 80 typically matches JPG at quality 90 visually while being 30 to 50 percent smaller. AVIF at quality 70 matches WebP at 80.
If you are unsure your plugin is hitting these targets, download a recently uploaded image, compare it to the original in your media library, and check both file sizes. If the "optimized" version is more than 80 percent of the original size, the plugin is being too conservative; if it is under 30 percent and the image looks crunchy, it is too aggressive. Run a test image through Compress JPG at quality 82 as a sanity-check reference. Pair with compress image and the image converter for spot checks.
Pick the tool that matches your team's technical comfort, not the one with the loudest marketing. Both server-side and plugin approaches can hit the same end state — what fails is the half-configured middle, where a plugin is installed but bulk optimization never finished and 60 percent of the library is still serving 4 MB originals.
Multisite networks and image optimization
WordPress Multisite networks add a wrinkle: each subsite has its own uploads directory but shares the codebase and plugins. Some optimization plugins charge per-site or per-network; some bill per-image regardless of which subsite owns it. Read the pricing fine print before licensing.
For network admins, a network-activated optimization plugin lets every subsite share the same configuration. The trade-off is that subsite owners cannot override quality settings if they need higher fidelity for, say, a portfolio site versus a press-release site. The right call depends on whether subsites are independent properties (let them choose) or branches of the same brand (centralize).
Recompressing already-optimized libraries
If a previous plugin compressed your library at quality 60 and you now want quality 80, you cannot recover the quality you already lost. Re-optimizing only further compounds artifacts. The right move is to re-upload from the original masters, if you still have them, and run the new pipeline from scratch.
If the masters are gone — sometimes they are, especially if the original photographer stopped maintaining a backup — you have two options. One, accept the current quality as the floor and just convert to modern formats (WebP, AVIF) without further compression. Two, run images through an AI upscaler like AI upscaler to mitigate visible artifacts before re-optimizing. The upscaler trick works surprisingly well for hero images where the visible quality matters and the originals are unrecoverable.
Per-image-type quality strategy
Not every image deserves the same treatment. Headshots and portraits hide compression artifacts in skin tones; you can drop them to quality 70 without visible damage. Landscape photos with broad gradient skies show banding at low quality; keep them at 82 or higher. Product photos on white backgrounds compress aggressively because there is little color information; quality 75 is usually fine.
Configure your plugin to use different quality presets per upload context if it supports it (ShortPixel and EWWW both do). The aggregate file-size savings vs. a single global quality are modest — 5 to 10 percent — but the visible quality on the images that need it is meaningfully better. For a portfolio site or a fashion catalog, that visible improvement matters more than the raw bytes.
The headless WordPress consideration
Headless WordPress installations (where WP is the CMS and a Next.js or similar frontend renders the pages) flip the optimization story. Most image-optimization plugins were built for traditional WordPress and add their WebP rewriting via the wp_content_save_pre filter chain, which has no effect when the frontend is a separate Node app. You need either a CDN-based optimizer (Optimole, Cloudinary, ImageKit) or build-time image processing in the frontend (Next.js's <Image> component, sharp in a build script).
The trade-off is more setup complexity but cleaner separation of concerns. The frontend controls performance; the CMS just stores the bytes. For high-traffic sites, this architecture wins on every metric — but for a single-blog site, the operational overhead is not worth it.
The cost of "free" plugins
All five plugins offer free tiers, but free is rarely free at scale. Free tiers come with daily image quotas (Imagify: 25 MB/month free), CDN bandwidth caps (Smush: limited), or features locked behind paid plans (EWWW: WebP needs the paid tier on some hosts). A growing site hits the paywall fast.
Budget for the paid tier from day one if you expect more than 1,000 images. The cost ($5 to $30 per month) is small relative to the hosting bill, and the performance benefit compounds. Free tier plugins also tend to be more aggressive about email upsells and dashboard nag screens, which adds noise to your WP-admin workflow.
Plugin conflicts with caching layers
Image optimization plugins often conflict with caching plugins (WP Rocket, W3 Total Cache, WP Super Cache) in subtle ways. The most common conflict: the cache plugin serves the original HTML referencing the JPG before the optimizer's WebP rewrite rule kicks in. The result is that cached visitors see JPG while uncached visitors see WebP — making Search Console field data noisier than it should be.
The fix is to invalidate the cache after every bulk-optimize run and confirm that the cache plugin honors the image-optimizer's rewrite rules. Some optimizer plugins include a "purge cache" button that triggers both their own and the linked cache plugin. If yours does not, add a custom action that runs both purges sequentially.
What to do when the plugin breaks
Every plugin eventually has a bad update. The signs: images stop loading, WebP rewrites stop working, or the admin dashboard hangs. The recovery is straightforward but worth rehearsing. Deactivate the plugin via SFTP or wp-cli if the admin panel is unreachable. Verify that originals are intact in the uploads folder. Reinstall the previous version of the plugin from the WordPress.org SVN archive if needed.
Keep a backup of the uploads folder before any plugin upgrade. The 30 seconds it takes to snapshot via rsync or your host's built-in backup tool can save hours of recovery work. For mission-critical sites, schedule plugin upgrades during low-traffic windows and have a rollback plan documented.