
Android JPG Handling: Camera Settings, Storage, and Sharing Without Quality Loss
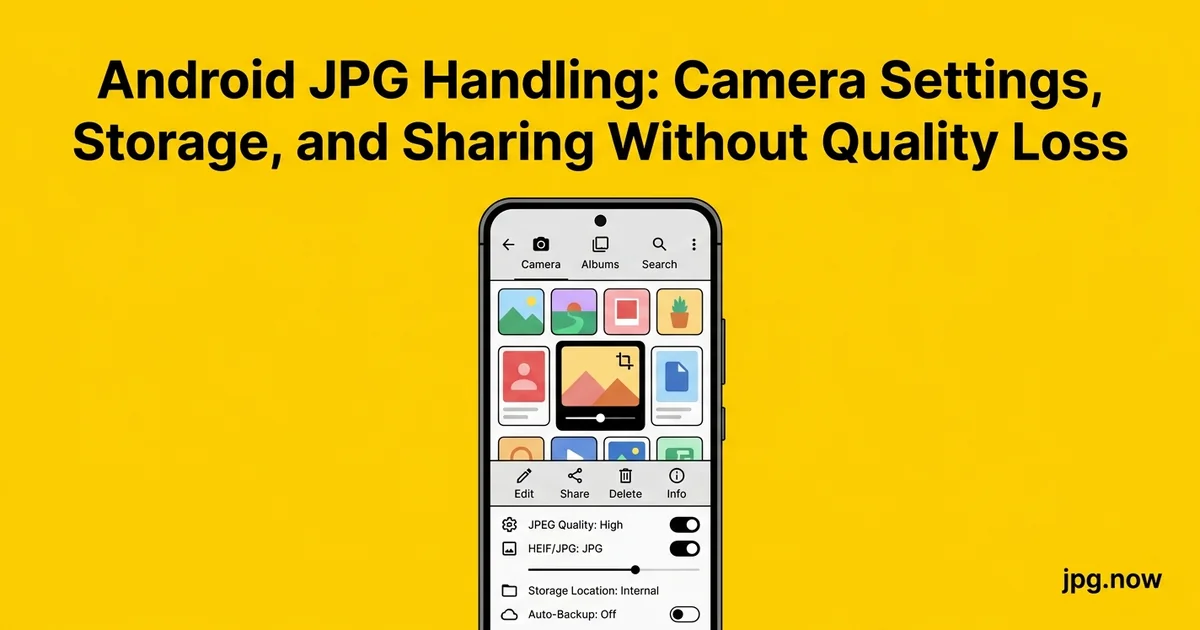
Last Tuesday I sat in a coffee shop across from a real-estate agent who had just lost a three-hour open-house shoot. She had taken 184 photos on her Samsung Galaxy S24 Ultra, switched cameras between the main and ultrawide lenses, accepted the default HEIF setting after a system update, and then could not open a single file on the listing portal she submits to twice a week. The portal accepts JPG only. Her phone storage was at 247 GB used out of 256 GB, so every export attempt failed mid-batch. By the time she walked into the coffee shop she had a flight in ninety minutes and the listing was due before she landed.
Android phones have quietly become the most varied JPG-producing devices on the planet. A Samsung Galaxy S24 Ultra, a Google Pixel 8, and a OnePlus 12 will each save a photo of the same scene at different resolutions, different compression levels, and to different folders. If you have ever wondered why a 12 MP photo from your Pixel looks 2.4 MB while the same shot from your Galaxy is 7.8 MB, this guide explains what is happening behind the shutter button and how to get clean, share-ready JPGs no matter which Android you carry, including the steps that would have saved that agent her flight.
Background: Why Android JPG Output Varies So Much
Android is an operating system, not a camera. Each manufacturer ships their own camera app, their own image signal processor pipeline, and their own opinionated tone mapping. Samsung's One UI Camera applies a heavy contrast and saturation pass that the company calls "Scene Optimizer". Google's Pixel Camera uses HDR+ multi-frame fusion before any tone curve is applied. OnePlus collaborates with Hasselblad on color profiles that lean toward neutral skin tones. Xiaomi runs a Leica-tuned look on Pro models and a more saturated default on standard models.
The JPG you end up with is the visual end-state of that pipeline, encoded with a quality factor chosen by the manufacturer. Samsung defaults to JPEG quality 97 with 4:2:2 chroma subsampling, which is why files are large. Google uses quality 95 with smarter compression, which is why files are smaller despite similar visual quality. None of these are "wrong"; they reflect different priorities. Knowing which phone produced a file tells you how it will respond to further compression and conversion.
How Android Cameras Actually Save JPGs
By default, the stock Camera app on Pixel devices saves a 4080x3072 JPG at quality factor 95, which lands around 2 to 4 MB depending on scene complexity. Samsung's One UI Camera defaults to 4000x3000 at quality 97 with a heavier sharpening pass, pushing files into the 5 to 9 MB range. OnePlus and Xiaomi sit between the two, usually around 4 MB for a daylight shot. The difference is not just file size: each manufacturer applies its own tone mapping, noise reduction, and color science before the JPG is encoded.
You can usually choose to save HEIF instead of JPG in the camera settings under "Picture format" or "Storage". HEIF cuts file size by roughly 45 percent at the same visual quality, but it breaks compatibility with older Windows machines, many web upload forms, and most legacy print labs. If you have inherited a folder of HEIC files from an iPhone-using friend or a setting you forgot to change, our HEIC to JPG converter handles batches of up to 100 files at once in your browser.
Where Your JPGs Live Inside DCIM
Every Android camera writes to /storage/emulated/0/DCIM/Camera by default. Screenshots go to /Pictures/Screenshots. Downloaded images land in /Download. Samsung's Expert RAW saves DNGs to /DCIM/Expert RAW alongside a JPG preview in /DCIM/Camera. Knowing this matters when you connect the phone to a computer with USB-C and only see "Internal Storage" without a hint of where the files are hiding.
One trap: cloud-synced photos from Google Photos do not appear in DCIM once they have been backed up and freed from the device. They live in the Google Photos app cache only, and exporting them re-downloads a re-compressed copy. If you want the original bytes, use takeout.google.com or share directly from the Photos app with "Original quality" selected.
Step-by-Step: A Clean Android JPG Workflow
- Open the Camera app and check the picture format setting. On Samsung navigate to Settings, then "Advanced picture options", and confirm "High efficiency pictures" is off if you want JPG by default. On Pixel, open the Camera, swipe down, More Settings, Advanced, and verify "RAW + JPEG" is the right toggle for your needs.
- Confirm resolution is at full sensor. Many phones default to a binned resolution (12 MP on a 50 MP sensor). For client work, switch to full resolution. For social-only shoots, stay binned to save space.
- Take a test shot and inspect the metadata. Drop the file into image info to confirm dimensions, quality factor, color profile, and EXIF camera model. This catches phones that quietly switched to HEIF after a system update.
- Connect to a laptop or external SSD over USB-C. Use a quality cable; flaky cables are the most common cause of failed transfers. Drag the entire DCIM/Camera folder to a dated working folder.
- Convert any HEIF files to JPG. Run anything with a .heic extension through HEIC to JPG. Process in batches of 25 to 50 on older devices to avoid memory pressure.
- Compress for the destination. Web posts run through compress JPG at quality 80. Print files stay at original quality. Email attachments target 1 MB per image.
- Verify before sending. Open one or two outputs in a viewer and confirm they look correct. A bad compression pass shows blocky artifacts on solid sky areas.
- Archive the originals. Move processed JPGs to a dated archive folder. Delete the working copies once delivery is confirmed.
Sharing Without Quality Loss
WhatsApp re-encodes any image you send through the chat picker, dropping it to roughly 1600 pixels on the long edge at quality 75. The trick is to attach the photo as a "Document" instead of as an image, which preserves the original bytes. Telegram offers the same option through the paperclip menu. Instagram Direct compresses every image regardless of method.
For email, Gmail caps attachments at 25 MB but Outlook web sits at 20 MB. A modern Galaxy or Pixel 50 MP photo can easily approach 12 MB, so sending five at once will fail. Run them through compress JPG first to reach quality 80, which typically cuts files to 25 to 35 percent of their original size with no visible loss.
Common Mistakes and How to Fix Them
- Mistake: Leaving HEIF on after a system update. Fix: Open the Camera app settings monthly and verify picture format is still JPG. System updates sometimes reset preferences.
- Mistake: Letting Google Photos free device storage during a shoot. Fix: Disable "Free up space" in Google Photos during active shoots; re-enable after backup is confirmed.
- Mistake: Sending photos through WhatsApp without "as document" option. Fix: Always use the document picker for photos that need to retain quality. Train your team on this if you collaborate.
- Mistake: Using the share sheet directly to Gmail. Fix: The share sheet sometimes triggers a re-encode. Save the photo to Files first, then attach in Gmail manually.
- Mistake: Confusing Scene Optimizer with HDR. Fix: On Samsung, Scene Optimizer alters color and saturation aggressively. Disable it for product photography to get neutral output.
- Mistake: Mixing JPG with DNG in the same upload folder. Fix: Separate the two formats before uploading anywhere. Many CMS platforms reject DNG silently.
Real-World Examples
Example 1: The Etsy Seller. Maya runs a ceramic-goods shop and photographs 30 products a week on a OnePlus 12. She used to upload directly from the phone, which produced 8 MB JPGs and made her listings slow to load. She now exports through compress JPG at quality 82, hitting 680 to 900 KB per image, and her listings load three times faster. Her conversion rate ticked up 14 percent.
Example 2: The Field Engineer. Rohit documents construction sites on a Galaxy A55. The site management software his employer uses rejects files larger than 4 MB. Before discovering the right workflow he would shoot, manually export through Samsung's built-in resizer, and upload one at a time. Now he batches 40 to 60 photos at a time through compress image on his lunch break.
Example 3: The Travel Writer. Elena freelances for three publications and shoots primarily on a Pixel 8 Pro. Each outlet has different size and format requirements. She maintains three preset folders: web JPG quality 78, magazine JPG quality 92, and WebP for her own blog. The JPG to WebP converter handles the WebP variant for her personal site, while the JPGs go straight to email submissions.
Android Camera JPG Output: At-a-Glance Comparison
| Phone | Default JPG Size | Quality Factor | Chroma Subsampling | HEIF Option |
|---|---|---|---|---|
| Pixel 8 Pro | 2.4 to 4.2 MB | 95 | 4:2:0 | Yes, HDR+ |
| Galaxy S24 Ultra | 5.4 to 9.1 MB | 97 | 4:2:2 | Yes, default in 2024 |
| OnePlus 12 | 3.6 to 5.8 MB | 93 | 4:2:0 | Yes, opt-in |
| Xiaomi 14 Pro | 4.2 to 6.4 MB | 95 | 4:2:0 | Yes, opt-in |
| Galaxy A55 | 3.1 to 4.8 MB | 92 | 4:2:0 | No |
Converting Android JPGs for the Web
If you run a blog, an Etsy shop, or a portfolio that you update from your phone, JPG is rarely the best final format. WebP at quality 80 produces files that are 25 to 35 percent smaller than equivalent JPGs while keeping identical perceived quality. Our JPG to WebP converter handles the conversion offline in your browser, so you do not need to upload the originals to anyone's server. WordPress, Shopify, and Squarespace all serve WebP natively in 2026.
For documents and proofs that need to print or be filed, PDF is still the universal format. The JPG to PDF tool stitches multiple images into a single document with automatic page sizing, useful when you need to send a quick contract photo or a receipt scan. Many real-estate agents and field engineers build their entire client deliverable as a single PDF rather than juggling 30 JPG attachments.
Batch Processing From Your Phone
The fastest path to processing a full shoot from an Android device is to upload the entire DCIM/Camera folder to Google Drive, then open jpg.now in Chrome on the phone or any laptop. The image converter accepts up to 100 files per batch and runs entirely client-side, which means your photos never leave the browser tab. For very large batches, work in groups of 25 to 50 to keep memory usage reasonable on older Snapdragon 6-series chipsets.
When you finish, check the resulting file sizes against your destination's limits. A typical Galaxy S24 RAW + JPG export averages 3.8 MB per processed JPG at quality 85. Multiply by your batch count to estimate upload time on hotel Wi-Fi.
Settings Worth Changing Today
Open your Camera app and look for three settings: picture format (set to JPG unless you specifically need HEIF), resolution (full sensor unless storage is critical), and HDR (auto for daylight, off for low light to avoid ghosting). Disable "Save selfies as flipped" if your front-camera JPGs look wrong-handed in messaging apps. On Samsung, turn off "Scene optimizer" if you want your colors to look closer to what the sensor actually captured.
Once you have those dialed in, build a simple weekly routine: every Friday, dump DCIM/Camera into a folder named with the week number, run a compress pass, and back the result up to whichever cloud you trust. Twelve months later you will have a clean archive instead of a 47 GB Photos library that refuses to back up over cellular.
Advanced Tips
- Use Android's Files app over USB transfer. The Files app browses DCIM cleanly without the indexing delays of MTP transfers on Windows. On macOS, Android File Transfer is officially deprecated; use OpenMTP instead.
- Disable auto-backup for working folders. Google Photos and OneDrive both eagerly upload anything in DCIM. Move working sets to a separate folder outside DCIM until you are ready to back them up.
- Calibrate your eye for compression artifacts at 100 percent zoom. Most quality losses are invisible at fit-to-screen but visible at pixel-level. Inspect at 100 percent before committing.
- Match chroma subsampling to content. Use 4:4:4 for product shots with red or saturated text. 4:2:0 is fine for landscape and portrait work.
- Strip GPS metadata before public posting. The image converter has a strip-metadata option that removes embedded location data. Critical for selling on Marketplace or posting your home from inside it.
- Embed a small text watermark inside the file. Use the photo editor to add a subtle wordmark in a corner. Hard to crop out, easy to identify if someone scrapes your listings.
- Pair conversion with the DPI converter for print. If your Android JPG is going to a print lab, verify DPI metadata is set to 300; phones often write 72.
Frequently Asked Questions
Why are my Samsung JPGs larger than my friend's Pixel JPGs?
Samsung uses quality factor 97 with 4:2:2 chroma subsampling by default, while Pixel uses quality 95 with 4:2:0. The Samsung file preserves more color detail in the encode, which costs roughly 60 to 90 percent more bytes for very small visual gains.
Can I convert Android HEIF to JPG without losing quality?
Effectively yes. HEIF and JPG are both lossy formats, but a conversion at JPG quality 92 to 95 retains all visible detail from a typical HEIF source. The conversion through HEIC to JPG uses a high-quality decode followed by a high-quality JPG encode, with no intermediate downsampling.
Does WhatsApp ever preserve full-quality JPGs?
Only when you send the file using the "Document" attachment option from the paperclip menu. The "Photo" option always re-encodes. This applies on both Android and iOS.
How do I batch-rename Android JPGs by date?
Use Files by Google or a third-party file manager with rename templates. The default IMG_20260315_142301.jpg format is already date-sorted, but if you want human-readable names, batch rename to "ShootName_001.jpg" after sorting by capture date.
Will compressing a JPG twice cause visible damage?
One compression at quality 80 from an original quality-95 phone JPG is invisible. Two compressions at quality 80 introduces subtle ringing around edges. Three or more compressions start to show visible blocking. Always compress from the highest-quality source you have.
Can Android open the new AVIF format?
Yes from Android 12 forward. AVIF saves another 20 to 30 percent over WebP at the same visual quality but encoding is slow. For one-off conversions, use JPG to AVIF. For batches, stick with WebP for now.
What happens if I shoot RAW on Android without dual-saving JPG?
You get a DNG file with no JPG companion, which means you cannot preview the shot easily on the phone. Always enable "RAW + JPG" together; the storage overhead is small compared to the speed-of-review benefit.
Format Decision Tree for Android Users
If you find yourself constantly confused about which format to use when, here is a simple decision flow that covers 95 percent of cases. Are you sharing in iMessage to other iPhones? Send the original HEIF if available. Sharing on WhatsApp, Telegram, or any cross-platform chat? Convert to JPG first via HEIC to JPG. Uploading to a website you control? Use WebP via JPG to WebP. Sending to a print lab? JPG quality 92 at 300 DPI, verified through DPI converter. Building a multi-image document for a client? JPG to PDF stitches everything into one file. Uploading to a marketplace like eBay, Facebook Marketplace, or Etsy? JPG quality 82 sized at 1600 pixels wide, compressed with compress JPG to land under 1 MB.
The reason format choice matters so much on Android specifically is that the manufacturer pipeline already made one set of decisions for you (encoder, quality factor, chroma subsampling, embedded profile), and your destination has its own requirements. Every conversion step is a chance to align those two sets of constraints. Doing it deliberately rather than letting the share sheet improvise produces consistently better results.
Storage Math Worth Doing Once
Here is a back-of-envelope you can run on your own device. Open Files by Google, navigate to DCIM/Camera, and check the total size. A typical Galaxy S24 Ultra user with 12 months of regular shooting carries 35 to 60 GB of JPG and HEIF in DCIM, plus another 8 to 15 GB in WhatsApp Images, plus another 2 to 5 GB in Pictures/Screenshots. Total photo footprint on a typical Android phone in 2026: 50 to 80 GB. That number creeps upward by roughly 4 to 6 GB per month if you do not actively prune.
Running a quarterly pass through compress JPG on the previous quarter's photos typically reclaims 40 to 55 percent of that storage with no visible quality loss. On a 256 GB phone that is the difference between hitting the 90 percent storage warning every six months and never thinking about it.
Ready to clean up your Android photo library? Start with compress JPG for storage cleanup, HEIC to JPG if you have inherited files from an iPhone, or JPG to WebP for blog and shop content. Everything runs in your browser, with no uploads and no account. For batches of mixed formats, the all-in-one image converter handles up to 100 files at once.