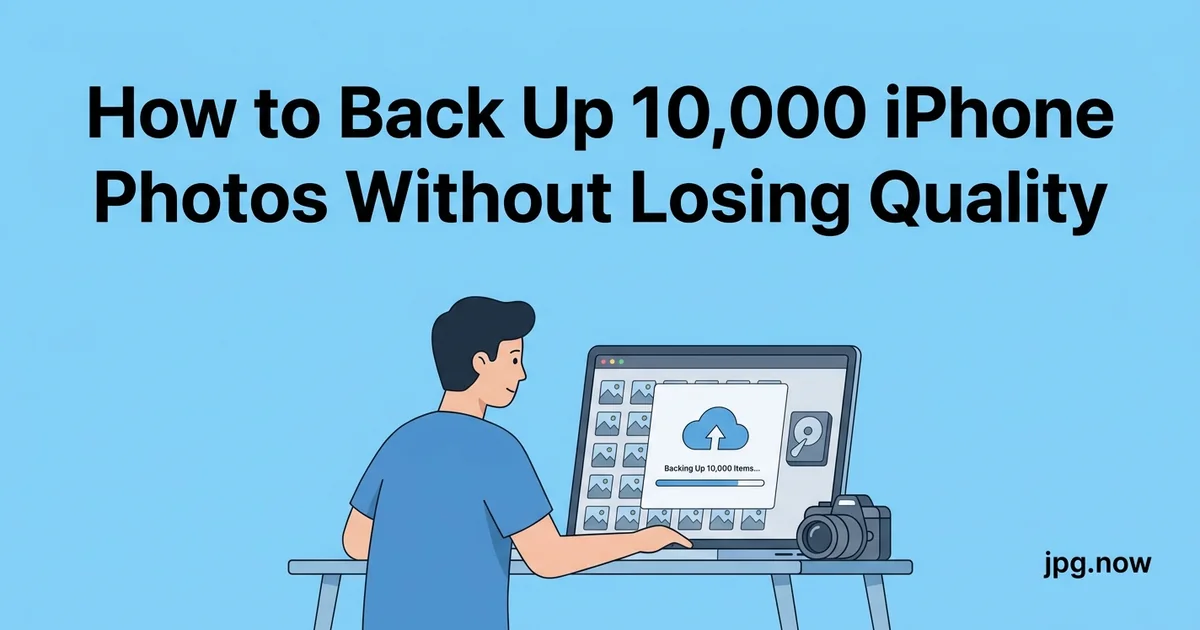
How to Back Up 10,000 iPhone Photos Without Losing Quality
Your iPhone has 47,832 photos in it. iCloud just sent you the third storage-full notification this week, and the upgrade prompt is asking for $9.99 a month to give you 2 TB of headroom. You do not want to delete anything, you do not want to lose quality, and you have a quietly creeping fear that the HEIC files you have been collecting since 2017 might not be openable on whatever computer you own in 2031. Meanwhile, your spouse has 23,000 photos in a separate iCloud account, your kid is on the family plan with 18,000 of their own, and the storage math gets worse every month.
This is a problem with a permanent, affordable, full-quality solution that takes one Saturday morning to set up and 90 minutes once a year to maintain. It uses less than $200 of hardware, costs under $10 a month in services, preserves every original byte at full quality, and produces a backup that you can hand to a Windows user, a print kiosk, or a future version of yourself a decade from now. This article walks through exactly how to build it.
Background: the real problem is HEIC, not size
iPhones since the iPhone 7 default to HEIC (technically HEIF wrapped around HEVC encoding) instead of JPG. HEIC files are roughly half the size of JPG at the same visible quality, which is the right choice for storage on the phone and the wrong choice for almost every other context. Windows requires a paid codec from Microsoft. Older Android phones cannot open the files at all. Most photo printers, picture frames, smart TVs, and family-sharing apps choke on HEIC.
A backup that you cannot open in 10 years is not a backup. So the first principle is decoupling "store the original" from "have a viewable copy." You keep the HEIC originals as your archival master, and you maintain a parallel JPG mirror as the practical-access copy.
Background: the 3-2-1 backup principle, adapted for phone photos
The 3-2-1 rule was developed for enterprise IT in the 1980s and still holds for personal photo archives. Three copies. Two different physical media. One off-site. For phone photos, the natural mapping is:
- Copy one: iPhone + iCloud Photo Library (the live working set)
- Copy two: Local external drive (the practical-access JPG mirror)
- Copy three: Cloud backup of the external drive (off-site, automated)
Each copy serves a different purpose and protects against a different failure mode. iCloud protects against losing the phone. The external drive protects against iCloud account loss or pricing changes. The cloud backup protects against fire, theft, or hardware failure of the external drive.
Step-by-step walkthrough
Step 1: Audit what you have
Open Settings > Photos on the iPhone and check the total count. Open Settings > [Your Name] > iCloud > Photos and verify iCloud Photo Library is on and set to "Optimize iPhone Storage." This means the phone holds only previews while iCloud holds the originals — meaning your local backup will pull from iCloud's master copy, not from compressed phone-side previews.
Step 2: Buy the external drive
A 2 TB external SSD costs around $130 in 2026 and holds a family-of-four's photo library for the next decade. Samsung T7, Crucial X9 Pro, and SanDisk Extreme are all reliable. Skip USB-A spinning drives — the speed difference for 250 GB of photos is meaningful (40 minutes vs 4 hours).
Step 3: Pull originals from iCloud
On a Mac: open Photos.app, select all, File > Export > Export Unmodified Original. Pick the external drive as the destination. Photos pulls each original from iCloud as needed, which can take several hours for a 30,000 image library — let it run overnight.
On Windows: install the iCloud for Windows app from the Microsoft Store, enable Photos sync, and let it download originals to %USERPROFILE%\Pictures\iCloud Photos\Downloads. Then drag that folder to your external drive.
Step 4: Convert HEIC originals to a parallel JPG mirror
Now you have a folder of HEIC originals on the external drive. Create a sibling folder called JPG_mirror. Drag the HEIC folder into the HEIC to JPG converter, choose quality 90, and download the converted batch into the mirror folder. For a 30,000-image library this is the longest single step — plan for 60 to 120 minutes depending on your connection and CPU.
Step 5: Optionally compress the JPG mirror
JPG at quality 90 averages 4 to 6 MB per phone photo. For a 30,000-image library that is 120 to 180 GB. If you want to shrink the mirror further without visible quality loss, run it through the JPG compressor at quality 80. The mirror drops by another 35 percent to around 100 GB. Never compress the HEIC originals — that defeats the purpose of keeping a master.
Step 6: Verify the mirror
Open ten random JPGs from the mirror. Confirm they open, the colors look right, and the EXIF date is preserved. The conversion process should retain orientation, timestamp, and GPS — verify all three before trusting the mirror.
Step 7: Set up cloud backup
Install Backblaze Personal ($9 a month). Add the external drive to the backup set. Let it run its initial upload, which can take 1 to 3 weeks for 200 GB on a residential connection. Once seeded, Backblaze maintains the off-site copy automatically.
iDrive is the alternative at similar pricing with the option to receive a physical drive shipment annually for offline backup. Choose based on your preference for software polish (Backblaze) vs flexibility (iDrive).
Step 8: Schedule the recurring sync
Put a recurring calendar event for the same Saturday every quarter. Plug the phone in, re-export new originals to the external drive, run the HEIC to JPG conversion on the new batch, verify the cloud backup picked up the changes. Total active human time per quarter: about 20 minutes. Total wall-clock time: 90 minutes mostly unattended.
Storage math by library size
| Photo count | HEIC originals | JPG mirror at Q90 | JPG mirror at Q80 | Drive recommendation |
|---|---|---|---|---|
| 5,000 | ~12 GB | ~25 GB | ~16 GB | Any 256 GB drive |
| 10,000 | ~25 GB | ~50 GB | ~32 GB | 1 TB external SSD |
| 25,000 | ~62 GB | ~125 GB | ~80 GB | 1 TB external SSD |
| 50,000 | ~125 GB | ~250 GB | ~160 GB | 2 TB external SSD |
| 100,000 | ~250 GB | ~500 GB | ~320 GB | 4 TB external SSD or NAS |
Common mistakes and how to avoid them
Trusting iCloud as your only backup. Diagnosis: pricing changes, accidental deletions sync to all devices, or the account is closed for billing reasons. Fix: iCloud is one copy of three. The local drive is your insurance.
Letting Google Photos compress your originals. Diagnosis: Google's "Storage Saver" tier silently recompresses every photo on upload, and the compression is irreversible. Fix: either pay for Google's full-quality tier or skip Google Photos as a backup channel entirely.
Forgetting to convert HEIC. Diagnosis: you backed up the HEIC originals and assume that means you have backed up your photos. Fix: HEIC alone is not enough. Maintain the JPG mirror as the practical-access layer.
Storing the external drive next to the laptop. Diagnosis: a single fire or theft event takes out both copies. Fix: cloud backup is the off-site copy. If you do not want cloud, swap two external drives between two locations every quarter.
Compressing the HEIC originals to save space. Diagnosis: you lossy-compressed your archival master and cannot recover the original quality. Fix: only compress the mirror, never the archive.
Skipping the verification step. Diagnosis: the conversion silently failed for 200 files in the middle of the batch and you find out three years later when you go to print them. Fix: spot-check the output after every conversion run. Re-run any failed files.
Real-world examples
Anita, mother of three in Atlanta. Anita's family library hit 38,000 photos across three iCloud accounts. She bought a 2 TB Samsung T7 for $130, ran the export over a weekend, converted with the HEIC to JPG converter into a separate JPG mirror folder, and added Backblaze for $9 a month. Total setup cost: $139 plus the first month of Backblaze. Annual cost going forward: $108. She downgraded the family iCloud plan from 2 TB to 200 GB and saved more in iCloud fees than the entire backup setup cost.
Raj, photographer who also has a personal iPhone library. Raj had his professional work backed up flawlessly but his personal phone photos lived only in iCloud. After watching a friend lose 6 years of family photos to a stolen iPhone and a forgotten password, he applied the same 3-2-1 logic to his personal library. The JPG mirror went onto the same NAS as his client archive. Two years later, when iCloud silently lost a few thousand photos due to a sync conflict (it does happen), he had clean replacements ready.
Linda, retiree with 22 years of family photos across multiple devices. Linda had photos scattered across an old iPad, a 2018 iPhone, a Windows desktop, and a forgotten Yahoo email account. Consolidating them all into a single JPG-formatted archive on an external drive took two weekends with the help of her grandson, and the HEIC to JPG converter handled the iPhone exports while the universal image converter handled the random PNG, BMP, and TIFF files scattered across the Windows desktop folders. The result: a single browsable folder of 14,000 JPGs spanning two decades, viewable on any device, backed up to Backblaze.
Advanced tips
Use Photos.app's smart albums for year-by-year exports. Smart albums let you filter by date range. Export "2024" as a batch, "2023" as another batch, and so on. Keeps the conversion runs manageable.
Organize the JPG mirror by year-month folders. 2024-06, 2024-07, etc. Browsing by date is more useful than a single flat folder of 30,000 files.
Maintain a checksum manifest. Run md5sum -r * > manifest.txt on the JPG mirror once a year. Detects bit-rot before it spreads.
Set up a printable-favorites folder. Star or favorite your 200 best photos in Photos.app, export those as full-resolution JPGs at quality 100, and keep them in a separate folder ready for printing or photo-book projects.
Document the recovery procedure. Write a 1-page README in the root of the external drive: how to restore, where backups live, contact info. Your future self or your family will thank you.
Use Hazel or Power Automate to automate the conversion. Once you have the workflow nailed, Hazel (Mac) or Power Automate (Windows) can watch the export folder and auto-run the HEIC-to-JPG conversion when new files appear.
Don't forget videos. Live Photos and 4K video balloon the storage estimates. Plan an extra 100 to 200 GB on top of the photo math, and consider keeping video originals on a slower spinning drive since you re-watch them less often than you browse photos.
FAQ
Does converting HEIC to JPG lose quality?
Some quality is lost in any lossy re-encoding, but at quality 90 the difference is invisible to humans at normal viewing distance. The convenience of universal compatibility outweighs the imperceptible quality difference for a viewing-copy mirror.
What if I run out of iCloud space mid-backup?
iCloud will pause uploads but not delete existing data. Upgrade temporarily, run the backup, then downgrade after the local mirror is established.
Can I use a NAS instead of an external SSD?
Yes, and many families do. Synology and QNAS units handle the 3-2-1 architecture natively with snapshot capabilities and built-in cloud-sync apps.
What about Live Photos?
Live Photos are HEIC files paired with short MOV clips. The conversion preserves the still frame as JPG; the motion clip exports separately as MOV. Some converters bundle both — verify on a sample before processing the full library.
Should I worry about EXIF stripping?
Most converters preserve EXIF by default. Spot-check by opening a converted JPG in Preview or Photos and confirming the date, camera, and GPS info appear in the Info panel.
What happens if Apple changes its photo format again?
The JPG mirror is the insurance policy. JPG is so universally established that it will be readable indefinitely. Apple format changes only affect what is in iCloud, not what you have on local storage.
How long should I keep the HEIC originals?
Forever, as long as storage cost permits. The originals have higher bit depth and better compression efficiency; future tools may extract more from them than today's tools can. Storage is cheap; archival completeness is permanent.
NAS as an alternative to external drives
For families with multiple devices or multi-terabyte photo libraries, a Synology or QNAP NAS offers a middle ground between an external drive and pure cloud backup. A two-bay NAS with a pair of 4 TB drives configured in RAID 1 costs around $400 and provides redundant storage that survives a single drive failure. Synology's Photos app provides browsing and search across the photo library from any device on the network, and cloud-sync tools push the same content to Backblaze or B2 automatically.
The NAS approach is worth considering when you have more than 500 GB of photos to manage or when multiple people in the household need to add to the same library. The setup is more complex than a USB drive but the ongoing experience is dramatically better.
What happens if you do nothing
The single most common photo-backup scenario in 2026 is "I'll deal with it later." Later eventually arrives in the form of a lost phone, a dead iCloud subscription, a forgotten Apple ID password, or a hard drive that decides at age six that it would rather not boot. Photo-recovery services exist for the catastrophic cases but they cost $300 to $2,000 and don't always succeed. The cheapest insurance policy for the entire family's visual history is a 2 TB external SSD and a Backblaze subscription — total annual cost about $130 — which means most families spend more on a single restaurant meal than they do on the protection that keeps their photo memories alive for the next decade.
Families with kids feel this most acutely. The first three years of a child's life are routinely the most photographed years of any human's existence, and the parents are typically the most time-pressed and least technically organized they will ever be. Building the 3-2-1 backup pipeline before the next major life event — birth, wedding, big trip — is a 90-minute investment that protects against the regret of irreplaceable loss.
Generational handoff considerations
If you are managing photos for an older parent or relative — increasingly common as Boomers and the Silent Generation digitize legacy prints — the JPG-mirror approach is especially important. Your 78-year-old mother is not going to learn HEIC, debug a NAS, or troubleshoot a sync conflict. A flat folder of JPG files on a portable drive that any computer she ever owns can open is the format that survives a generational handoff. Document the structure in plain English in a README. Add a second sibling who knows the password. Future-proof the access.
Start with one month
The whole strategy seems overwhelming for a 47,000-photo library. The actual starting point is small: pick the most recent month, run that batch through the HEIC to JPG converter, copy the result to whatever external drive you already own, and confirm the files open on a Windows laptop or a print kiosk. Once the loop exists at small scale, scaling it up to the full library is a weekend project with the converter and the JPG compressor handling the heavy lifting in the background. For phones that produce mixed format output, the universal image converter covers any non-HEIC stragglers, and for the occasional friend who emails you a WebP or AVIF the WebP to JPG and AVIF to JPG converters normalize them into the mirror automatically. The pipeline scales; the only thing it requires is starting.