
iPad Pro Photo Workflow: From Capture to Client Delivery in One Sitting
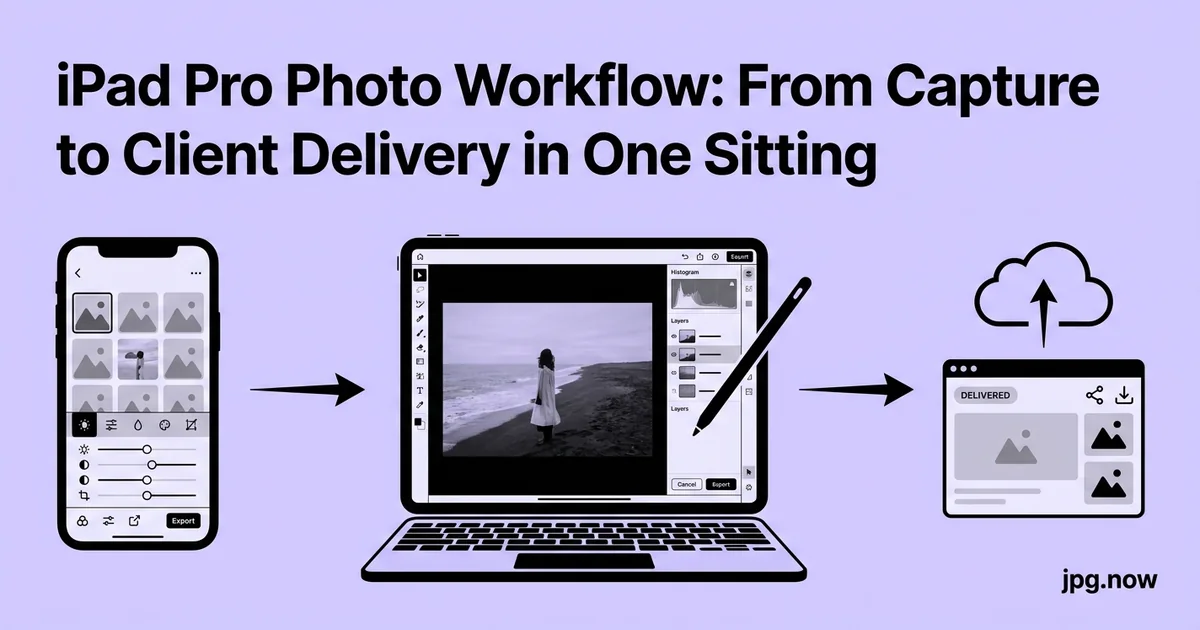
Two summers ago I covered a destination wedding in Lisbon with a 13-inch iPad Pro as my only editing device. Eleven hours of shooting, 1,847 frames captured on a Sony A7 IV, 312 selects edited and delivered before the post-reception breakfast the next morning. No laptop, no external monitor, no desktop Lightroom. The bride had her preview gallery in her hotel inbox by 7 a.m. local time. The pipeline worked because every step had a defined tool and a known time budget, and because the iPad Pro's M4 chip can finally chew through CFexpress reads, batch RAW edits, and JPG exports without thermal throttling.
The iPad Pro with an M4 chip has finally crossed the line where a working photographer can run an entire shoot through it without ever opening a Mac. Card reader to the USB-C port, RAW import in 11 seconds for a 200-frame card, edits in Lightroom Mobile or Photomator, client proofs out the door before the venue parking lot empties. Here is the pipeline I run on a 13-inch iPad Pro for weddings, headshot sessions, and small-business product shoots.
Background: Why the M4 iPad Pro Changed the Math
Earlier iPads could shoot but not realistically deliver. The 2018 11-inch iPad Pro choked on 200-image batch exports; the 2020 model was workable but slow; the M1 model in 2021 was the first that could match a low-end MacBook on RAW workloads. The M4 in 2024 jumped again, with a media engine that decodes ProRes natively and a thermal envelope that lets the CPU sustain heavy edits for an hour without throttling. Combined with iPadOS 18's expanded Files app and external-display support, the platform now matches what most working photographers actually need.
The bottleneck for iPad workflows is no longer the iPad. It is the apps. Lightroom Mobile parity with desktop is good but not perfect. Photomator has caught up impressively. Capture One Pro for iPad remains the spotty one. Plan around app strengths and you can run a full session on iPad alone.
Importing RAW From a Card Reader
Plug any USB-C card reader into the iPad. The Files app sees the card immediately under "Locations". I prefer Sandisk Pro-Reader CFexpress for fast cards and a $19 Anker UGREEN dongle for SD. From there you have two import paths: Photos.app (auto-organizes by date, applies iCloud sync) or Files.app (raw folder structure, no automatic processing). For paid work I always use Files because it preserves the original DCIM hierarchy and lets me back up to an external SSD before any edits.
Import time for a 64 GB CFexpress card full of Canon CR3 files is roughly 8 minutes over USB-C. Sony ARW from an A7 IV averages 14 seconds per file for the import write. If you shoot a mix of RAW and JPG, the JPGs come in first because they are smaller, which is useful for fast culling. When you need to convert a CR3 file outside Lightroom for a quick share, use the CR3 to JPG converter; for older Canon shooters, CR2 to JPG handles legacy bodies.
Step-by-Step: A Full iPad Session, Shutter to Delivery
- Card to iPad. Plug card reader into USB-C. Open Files. Drag the DCIM folder to a dated working folder on iPad storage. Verify file count matches camera display.
- Backup before editing. Plug in a USB-C SSD. Copy the working folder to the SSD. Never edit the only copy of a client's files.
- Cull in Lightroom Mobile. Import the folder, flag picks with the keyboard P key (Magic Keyboard) or three-finger tap on the photo. Aim for 15 to 25 percent select rate.
- Apply a baseline preset. Pick the first hero shot, set white balance, exposure, contrast, and color. Copy settings. Paste to all selects.
- Fine-tune each select. Spend 30 to 90 seconds per image. Focus on exposure correction and skin tone where applicable.
- Export web tier. File export menu, JPG, 2048 pixels on long edge, quality 78, sRGB profile.
- Export print tier. Same selects, full resolution, JPG quality 92, sRGB or Adobe RGB.
- Run the web tier through compress JPG. Verify each file lands under 1 MB for email delivery.
- Build proof PDF and send. Use JPG to PDF for the proof deck, drop in Dropbox for the print tier.
Editing on iPad: Lightroom vs Photomator
Lightroom Mobile is free for basic edits and $9.99/month for the photography plan with masking and AI Denoise. Photomator is $4.99/month or $59.99 one-time, with the same Apple ML denoise engine as macOS. For volume work (weddings, events), Lightroom wins because its sync to desktop is bulletproof. For one-off product shoots, Photomator's batch processing and clean export panel are faster.
Both apps export 16-bit ProRAW edits to JPG with surprising fidelity. A typical M4 iPad Pro exports 200 edited JPGs at full sensor resolution in roughly 6 minutes. If your camera shoots a RAW format Lightroom does not understand natively, run it through our RAW to JPG converter first to get a baseline image you can quickly review.
HEIC From the iPhone Companion
Most photographers use an iPhone as a backup camera for behind-the-scenes shots. Those land in HEIC format by default. Clients almost universally want JPG. AirDrop the HEICs to the iPad, then drop the folder into HEIC to JPG in Safari. The browser processes them locally without uploading anything, which matters when you are on hotel Wi-Fi or a venue's guest network. A batch of 80 HEIC files (typical iPhone 15 Pro behind-the-scenes set) converts in under 90 seconds.
Compressing for Client Delivery
Final delivery has two tiers. Web proofs go out at 2048 pixels on the long edge, JPG quality 78, color-managed for sRGB. Print files go at full resolution, quality 92, with embedded sRGB profile. The web proofs need to fit a typical client email of 12 to 15 images under the 25 MB Gmail limit, which means each image should be under 1.6 MB. Running them through compress JPG at quality 78 typically lands them between 380 and 720 KB.
For print files I do not compress at all. A 6240x4160 JPG at quality 92 from a Sony A7 IV lands around 9 MB, which is the right number for a professional lab. Anything smaller starts to show artifacts at 24x36 print sizes.
Common Mistakes and the Fix
- Mistake: Importing directly to Photos.app for client work. Fix: Use Files.app. iCloud Photos can quietly free originals, and you lose access to a card you have already wiped.
- Mistake: Editing the only copy. Fix: Always duplicate to an external SSD before opening the first file in Lightroom. SSD failure rates are low but client trust failure rates are higher.
- Mistake: Letting iCloud sync run during import. Fix: Toggle iCloud Photo sync off until import and backup are complete. Cellular data on the venue's iPad plan can hit a hard cap fast.
- Mistake: Sending raw exports without compression. Fix: Always run the web tier through compress JPG. A 9 MB JPG that should be 600 KB is a deliverability failure waiting to happen.
- Mistake: Confusing the iPad's screen rendering with print color. Fix: Soft-proof in Photomator and double-check critical files on a calibrated external display before the lab gets them. The iPad's display is wide-gamut and rich but not lab-calibrated by default.
- Mistake: Letting the iPad sleep mid-export. Fix: Plug into power and set Auto-Lock to Never in Settings during long exports.
Real-World Examples
Example 1: The Wedding Photographer. Sarah covers 35 weddings a year and started running iPad-only workflows in 2024. Her preview gallery (40 to 60 images) ships within 24 hours of the ceremony. She edits on the train ride home from venues. Time saved vs her old laptop workflow: roughly 90 minutes per wedding.
Example 2: The Headshot Studio. Hugo runs a one-day headshot pop-up at corporate offices. He photographs 30 to 40 people in a morning and delivers retouched final files by end of day. The M4 iPad Pro plus a Magic Keyboard lets him work from any conference table without setting up a workstation.
Example 3: The Product Photographer. Aisha shoots e-commerce stills for a furniture brand. The art director sits next to her on shoot days, picking selects in real time on the iPad. By the end of the day they have a proof PDF ready for the brand's CEO, generated with JPG to PDF directly on iPad.
iPad Pro vs MacBook: Where Each Wins
| Task | iPad Pro M4 | MacBook Pro M4 | Winner |
|---|---|---|---|
| RAW import 200 frames | 11 seconds (CFexpress) | 9 seconds (CFexpress) | MacBook by a hair |
| Cull session (touch) | Fastest, natural gesture | Mouse and keyboard | iPad |
| Mask editing complex hair | Apple Pencil precise | Trackpad or tablet | iPad with Pencil |
| Batch export 200 JPG | 5.8 minutes | 4.2 minutes | MacBook |
| Multi-app workflow | Stage Manager workable | Native multi-window | MacBook |
| On-location size and weight | 682 g, fits any bag | 1.6 kg, dedicated bag | iPad |
| Cellular delivery from venue | Built-in 5G option | Needs hotspot | iPad |
Building a One-Sitting Delivery PDF
Many clients want a single PDF preview deck rather than a folder of JPGs. The iPad Files app can do this natively with "Create PDF", but it ignores compression settings and produces large files. The cleaner path is to compress your JPGs first, then run them through JPG to PDF. A 30-image proof deck at 2048 pixels lands around 14 MB, small enough to email or drop into a Dropbox link without any decisions about hosting.
Shortcuts and Files Automation
Apple Shortcuts on iPadOS 18 has a "Convert Image" action that handles JPG, HEIC, and PNG natively. Build a shortcut that takes the contents of a "To Convert" folder in Files, runs Convert Image with format JPG and quality 80, and writes the result to a "Delivered" folder. Tied to a Hot Corner or the Action Button on a Magic Keyboard, this turns ten-minute admin into a single tap.
For files where Shortcuts is not enough (anything involving multiple formats, advanced compression, or batch renaming), the browser-based image converter handles 100 files per batch with format mixing.
Cellular Delivery From the Venue
If your iPad Pro is cellular-equipped, you can deliver right from the venue. T-Mobile and Verizon 5G UC typically clock 80 to 220 Mbps in urban areas, which means a 15 MB proof deck uploads to Dropbox in 5 to 15 seconds. The bottleneck is almost always the source, not the connection: edit in airplane mode for battery life, then turn radios back on for upload.
One gotcha: if you use iCloud Photo Library, importing 200 RAW files at the venue will trigger a background upload that can saturate your cellular plan. Toggle iCloud sync off for the duration of the import, then back on when you reach Wi-Fi.
Advanced Tips
- Use Stage Manager for parallel apps. Run Lightroom and Files side by side so you can drag exported JPGs straight into a delivery folder.
- Calibrate the iPad display for print work. The Datacolor Spyder X works over USB-C with the SpyderX Mobile iOS app. Profile once a month.
- External SSD is mandatory. Samsung T7 Shield 2TB ($130) over USB-C writes at 800 MB/s. Buy two and rotate.
- Use Smart Albums in Lightroom. Auto-collect flagged picks into a "Delivery Web" and "Delivery Print" album for one-tap export.
- Pencil hover preview cuts cull time. Hover the Apple Pencil over a thumbnail to preview at larger size without committing a tap.
- Carry a Anker GaN charger. The iPad Pro draws up to 35 W during exports. A 30 W phone charger will charge slowly during heavy use; 65 W is the minimum for sustained work.
- Pair with the image info tool to verify EXIF survives a Lightroom export. The iPad Lightroom build sometimes strips lens metadata.
Frequently Asked Questions
Can the iPad Pro handle Sony A1 or Canon R5 50 MP files?
Yes, comfortably. The M4 chip is essentially identical to the M4 MacBook for RAW processing, and the 16 GB unified memory on the higher-tier iPads handles 50 MP files without thrashing.
Is iPad battery enough for a full wedding edit?
For culling, yes. For full edits of 200 selects, plug in. A 10-hour battery rating drops to roughly 4 hours under Lightroom load.
Can I tether my camera directly to iPad during the shoot?
Sony cameras with Imaging Edge Mobile work over Wi-Fi. Canon CR3 tethering is limited. For full tether-shoot workflow, Capture One Mobile is the strongest option but adds $30/year on top of Capture One Pro.
Does Lightroom Mobile sync break if I edit offline?
No. Edits cache locally and sync when you reach Wi-Fi. The catch is that iCloud Photos can interfere; disable it during sessions.
What about ProRAW from the iPhone?
ProRAW DNG files import directly to Lightroom Mobile. For lightweight conversion outside Lightroom, use DNG to JPG.
Can I edit on iPad and finish on Mac the next day?
Yes via Lightroom CC sync. All edits, ratings, and metadata travel automatically.
What is the catch with using Photomator instead of Lightroom?
Sync to a desktop is iCloud-based and slower than Adobe's cloud. Color treatments use Apple's pipeline, which differs from Adobe's; if a client expects "Lightroom look", stick with Lightroom.
What the Pipeline Looks Like End to End
Capture → card reader to Files (8 min) → cull in Photos or Lightroom (15 min) → edit 25 to 40 selects (45 min) → export to "Delivered" folder via Shortcut (4 min) → run compress JPG for web tier (2 min) → build a proof PDF via JPG to PDF (90 sec) → email or Dropbox link out (30 sec). Total active time from shutter to inbox: about 75 minutes for a 200-frame shoot.
Battery and Heat Management During Long Edits
The 13-inch iPad Pro M4 has roughly 10 hours of battery for general use and around 4 to 5 hours when running heavy Lightroom edits. For all-day shoots, plug into a 65 W or 100 W USB-C power adapter via a Magic Keyboard pass-through if possible. The iPad will charge while you edit, and the keyboard provides a stable working angle. Be aware that aggressive RAW exports while charging push the chassis temperature high enough to throttle the M4 chip after about 25 minutes of sustained load. Pause every 20 minutes if you notice export speeds dropping.
For week-long trips, a 20,000 mAh USB-C PD power bank like the Anker Prime 250W keeps the iPad alive across two full editing days. Avoid bargain-tier power banks; their output curves are unstable and trigger iPadOS power-throttling warnings.
Quality Assurance Pass Before Delivery
Before any client delivery, run a final QA pass. Open the delivered folder in Files, pick five random exports, view at 100 percent zoom in Photos.app, and confirm no banding, compression artifacts, or color casts. Run one through image info to verify the EXIF and color profile survived. For deliverables headed to print, also confirm DPI metadata is 300; iPad Lightroom sometimes writes 72 even when output resolution is high.
If you are setting up an iPad workflow this week, start with RAW to JPG for a baseline conversion, then add HEIC to JPG for your iPhone backup shots, and finish with compress JPG for delivery sizing. All three work offline in Safari and never upload your files.