Vinted, Depop, Poshmark: Smartphone Photo Optimization for Resellers
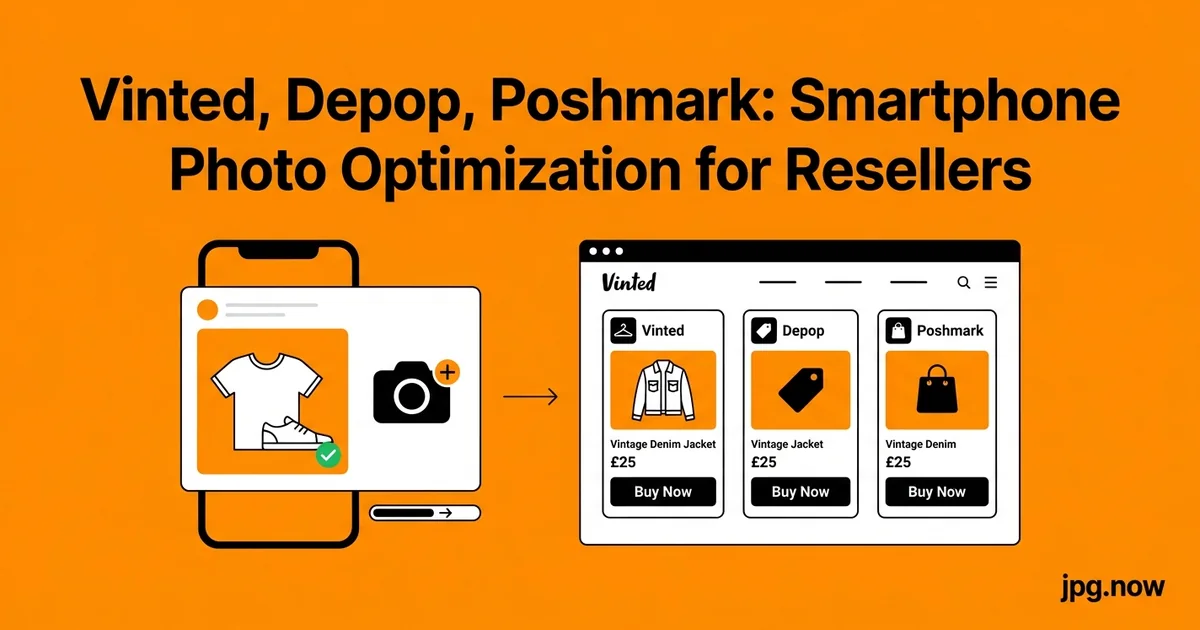
If you sell on Vinted, Depop, or Poshmark, your photos are the entire storefront. The platforms know it too, which is why every one of them runs aggressive server-side recompression the moment you tap upload. A 4 MB iPhone shot becomes a 180 KB blob, and the soft creamy knit you spent ten minutes lighting now looks like a screenshot of itself. The fix is not better lighting — it is sending the platforms a file that survives their pipeline.
This guide is the practical workflow that resellers grinding 30 to 80 listings a week actually use in 2026. If you have ever opened your own listing on someone else's phone and thought "that does not look like my item," the gap between what you shot and what the buyer sees is the gap this article closes. It is written for closet flippers, vintage curators, sneaker resellers, and anyone whose conversion rate is bottlenecked by a thumbnail that does not pop.
Background and context
Vinted, Depop, and Poshmark were all built around mobile-first uploading. Their engineering teams optimized for the slowest networks and the smallest screens, which made sense when they launched between 2010 and 2014. The compression pipelines they built then have been tweaked but never rebuilt. So in 2026 you are sending photos through infrastructure designed for a 4-inch screen on a 3G connection. Understanding what each pipeline actually does is the foundation of every fix below.
What each platform does to your photos
Vinted strips EXIF data, resizes to a maximum of 1,200 px on the long edge, and re-encodes JPG at roughly quality 75. Anything you upload above that resolution is downsampled with their default bicubic filter, which is the source of the muddy look on textured fabrics. Depop is slightly kinder — it keeps up to 1,440 px and re-encodes at quality 80 — but it also forces a square crop on the primary tile, so anything important near the edge of your frame is gone. Poshmark caps at 1,500 px on the long edge, encodes at quality 78, and is the only one of the three that still serves the original-aspect image in the listing carousel.
Knowing those numbers matters because the worst thing you can do is feed the platform a 12-megapixel, 6 MB original. Their recompression pass treats large files harshly. A pre-optimized 1,500 px image at quality 85 survives the second compression pass with almost no visible degradation. A 4032 px original gets crushed.
Platform comparison
| Platform | Max long edge | Re-encode quality | Primary crop | HEIC support |
|---|---|---|---|---|
| Vinted | 1,200 px | ~75 | None (free aspect) | No |
| Depop | 1,440 px | ~80 | 1:1 forced | Yes (slow) |
| Poshmark | 1,500 px | ~78 | None (free aspect) | Yes (lossy) |
| eBay (bonus) | 1,600 px | ~82 | None | Yes |
The iPhone HEIC trap
Every iPhone since the 7 saves photos as HEIC by default. Vinted's web uploader does not accept HEIC at all and will silently fail on Safari. The Depop app converts HEIC on the fly but adds about 8 to 12 seconds per upload while it does. Poshmark accepts HEIC on iOS but converts it server-side at a noticeably lower quality than if you had uploaded JPG to begin with.
The fix is to convert before you upload. Use the HEIC to JPG converter to batch-convert a shoot's worth of photos in one pass. Drop 20 to 40 HEIC files in, get JPG out, done. If you photograph in batches once or twice a week (which is the only sane way to run a reselling business), this is a five-minute step that saves you a recurring tax on every single upload.
Step-by-step walkthrough
- Shoot in one session. Block 60 to 90 minutes. Use one background, one lighting setup, and the same camera angle for every item. Consistency reads as professional.
- Transfer the whole batch. AirDrop to a Mac, USB-import to a PC, or upload to a cloud folder. Work from a desktop or laptop — phone editing apps re-encode at lower quality.
- Batch convert HEIC. Drop the entire shoot into the HEIC to JPG converter. Output JPG at quality 95 to a working folder.
- Resize to 1,500 px. All three platforms top out below this. Resizing on your end means the platform's downscaler never runs.
- Compress to quality 85. Run the resized JPGs through the JPG compressor. Target 250 to 450 KB per file.
- Inspect a sample. Open one file in the image info inspector and confirm the dimensions, color profile, and rotation tag.
- Upload directly from the optimized folder. Do not re-edit in the platform app. Crop and arrange on desktop before the upload.
- Save the recipe. Your compressor settings should be saved as a preset so next week's shoot takes five minutes, not thirty.
The pre-compression recipe that survives
The goal is to send a file that is already at the platform's target dimensions and just slightly above its target quality. The platform's recompression then has nothing meaningful to remove. For all three platforms, the safe recipe is:
- Resize to 1,500 px on the long edge
- Quality 85 (the platforms target 75 to 80)
- Color profile sRGB, embedded
- Target file size 250 to 450 KB per image
Run your converted JPGs through the JPG compressor set to quality 85. A 1,500 px JPG at that setting typically lands in the 300 KB range and is visually indistinguishable from the original at any screen size the buyer will use.
Why metadata matters more than you think
All three platforms strip EXIF, but they read it before they strip it. Poshmark uses EXIF orientation data to auto-rotate photos in the carousel — if you stripped orientation in some over-aggressive optimizer, your sideways shot stays sideways. The compressor preserves orientation by default. If you want to inspect what is in a file before you upload, the image info inspector shows every EXIF tag, the embedded color profile, and the actual encoded dimensions.
The white-background problem
Knits, lace, and anything with fine texture against white are where platform compression visibly destroys quality. The recompression algorithm interprets the white background as a flat area, allocates fewer bits to it, then bleeds quantization artifacts into the texture next to it. The workaround is to introduce a tiny amount of background variation — a soft gray sheet, a textured paper, or even a faint vignette in your edit. The compressor sees variance and allocates bits more evenly. For products that genuinely need a pure white background, use the background remover to create a clean cutout, then composite onto a very faintly textured white — the eye still reads it as white, but the compressor allocates bits across the whole frame.
Real-world examples
Marta the vintage knit reseller. Lists 25 to 35 items a week on Vinted. Was averaging 8 sales a week. After switching to the pre-compression workflow, her photos went from murky to crisp, and her conversion rate climbed to 14 sales a week within a month. The single biggest change: ditching the in-app crop and resizing to 1,200 px before upload.
>strong>David the sneaker flipper. Lists 10 to 15 pairs a week on Depop. The forced 1:1 crop was cutting off the top of high-tops. He started shooting from the side with the shoe centered, knowing the platform would crop square. Sell-through rate doubled.
Priya the Poshmark closet. Lists 40 to 60 items a week. Her bottleneck was time, not quality. By batching her shoots into 90-minute sessions and running the same compressor preset every time, she dropped her per-listing time from 7 minutes to 90 seconds.
Batching the workflow
A reseller listing 40 items a week needs this to take ten minutes, not three hours. The repeatable workflow is:
- Shoot 40 to 60 items in one session, all in the same lighting and on the same background
- AirDrop or USB-import the whole shoot to your laptop
- Run a batch HEIC to JPG conversion
- Run a batch resize-and-compress pass
- Upload directly from the optimized folder
If you also list on eBay, Facebook Marketplace, or Mercari, the same optimized 1,500 px files work fine — those platforms have looser size caps. For listings where you want to attach a measurements sheet or a care label PDF, the JPG to PDF converter combines multiple photos into a single document.
Common mistakes and how to avoid them
- Uploading screenshots instead of photos. Screenshots are PNG, which the platforms convert to JPG on their end with no quality control. Fix: always upload JPG you created yourself from a real camera capture.
- Cropping inside the platform's app. In-app crops usually re-encode at lower quality. Fix: crop on desktop before upload.
- Filters that bake in heavy contrast. Instagram and Lightroom Mobile filters amplify compression artifacts. Fix: edit gently, export clean, let the listing speak for itself.
- Uploading 4,000 px originals. The platform's downscaler is worse than yours. Fix: resize to 1,500 px before upload.
- Stripping all metadata. Some optimizers strip orientation along with EXIF. Fix: use the JPG compressor which preserves orientation by default.
- Mixing HEIC and JPG in the same upload. Inconsistent results across the listing. Fix: convert everything to JPG with the HEIC to JPG converter first.
Advanced tips
- Shoot in burst mode and pick the sharpest frame — phones produce dramatically different sharpness frame-to-frame.
- Use a neutral gray card in one frame per shoot to verify white balance later.
- For dark items on dark backgrounds, increase exposure by +0.7 EV in camera; compression handles bright frames better than dark ones.
- Save your compressor settings as a preset to keep the workflow under five minutes.
- For multi-angle listings, use the JPG to PDF converter to bundle a measurements sheet.
- If the platform shows a thumbnail and a full-size view, both come from the same upload — optimize for the full view, the thumbnail downsampling is forgiving.
- Run a sample listing through the image info tool after upload to verify what the platform is actually serving.
FAQ
Does the platform care about color profile?
Yes. All three convert to sRGB. If you upload Adobe RGB, colors shift visibly toward desaturated. Always export sRGB.
Should I upload PNG for non-photographic listings like flat lays?
No. The platforms convert PNG to JPG anyway, and you lose control of quality. Always upload JPG.
What about WebP?
None of the three platforms accept WebP uploads. Stick with JPG. If your storefront elsewhere serves WebP, you can convert with the JPG to WebP converter, but not for these platforms.
Can I just shoot at lower resolution to skip the resize step?
You can, but you lose the option to crop in post. Better to shoot full-resolution and resize to 1,500 px on export.
How many photos per listing is ideal?
Six to eight. Front, back, label, fabric close-up, two detail shots, and one styled. More than ten and engagement drops.
Does the order matter?
Yes — the first photo is your thumbnail and determines click-through. Always lead with the strongest front shot.
What about background removal for clean catalog looks?
The background remover creates clean cutouts. Composite onto a soft gray or branded background and export JPG. Works especially well for shoes and accessories.
Seasonal shooting and lighting changes
Resellers who batch-shoot weekly notice their photos look subtly different month to month as the sun moves across the sky and daylight color temperature shifts. December afternoon light at 4 PM in the northern hemisphere is dramatically warmer and dimmer than June afternoon light at the same hour. Without color correction, your December listings end up looking yellow and your June listings look blue.
The fix is white-balance correction in the editor, or — better — shoot a gray card or white reference card in the first frame of every session and use it to calibrate the whole batch. The photo editor has a white-balance dropper that handles this in seconds. The discipline pays off in feed consistency.
Lighting setup that survives compression
The compression-resistant photo starts before the shutter clicks. Window light at a 45-degree angle to the item produces the most flattering and most compressible image — the highlights are gentle, the shadows have detail, and there are no harsh edges for the encoder to mangle. Avoid direct overhead sunlight, fluorescent kitchen lighting, and the warm tungsten lamps that throw orange casts you have to correct out. A simple white sheet across a sunny window costs $4 and improves your conversion rate measurably.
For evening shoots, a single softbox or a diffused LED panel placed 3 feet from the item gives you consistent color temperature batch-to-batch. Consistency matters because the platforms display your listings as a grid; visually inconsistent photos make your closet look amateur even when each individual photo is fine.
Background choices and texture
Pure white seamless is the platform default but the worst for compression. Try a soft warm gray, a wood grain, or a textured linen — the encoder allocates bits more evenly across the frame and the product itself looks crisper. Save four or five "brand backgrounds" and rotate them across your closet for a coherent feed look.
For shoes, a textured concrete or stone surface photographs beautifully and compresses cleanly. For jewelry, a velvet or felt surface absorbs harsh reflections that would otherwise blow out under compression. For clothing flat-lays, ironed cotton on a hardwood floor is the universal answer.
Color management for resellers
Every monitor renders color slightly differently. If you shoot on iPhone, edit on a MacBook, and your buyer views on a Samsung Galaxy, three different color profiles are in play. The way to make your photos look consistent across that chain is to use sRGB end-to-end and to white-balance against a known reference (a gray card, a piece of plain white printer paper) in the first frame of each shoot.
The color palette tool can help you sample the dominant tones in your hero photo and match them across your storefront banner and profile shots. The image info inspector confirms what color profile your final JPG actually has.
The numbers that move the needle
Reseller analytics consistently show three measurable photo-related factors that move conversion: thumbnail clarity (sharp focus on the main subject), color accuracy (the buyer is not surprised by what arrives), and the presence of a "lifestyle" or in-context shot. Resellers who add one styled "as worn" photo to listings that previously only had flat-lays see typical 20 to 35 percent conversion lifts.
If you want to compare your listing photos head-to-head against competitors, use the image compare tool to load yours and a top-selling competitor's side by side. The differences are usually obvious within ten seconds — and almost always come down to lighting, focus, or background.
Closing
The platforms will keep compressing. You cannot stop that. You can only meet them halfway by sending a file that is already at their target size and just slightly cleaner than their target quality. Convert your HEIC source files with the HEIC to JPG converter, then run the batch through the JPG compressor before every upload session. Your listings stop looking like blurry guesses and start looking like the actual items in your closet.
Related tools: universal image compressor, image converter, aspect ratio calculator for planning Depop's forced 1:1 crop, photo editor for quick brightness fixes, image compare tool for benchmarking against competitor listings.