
Samsung Galaxy Expert RAW Workflow: DNG Files Demystified
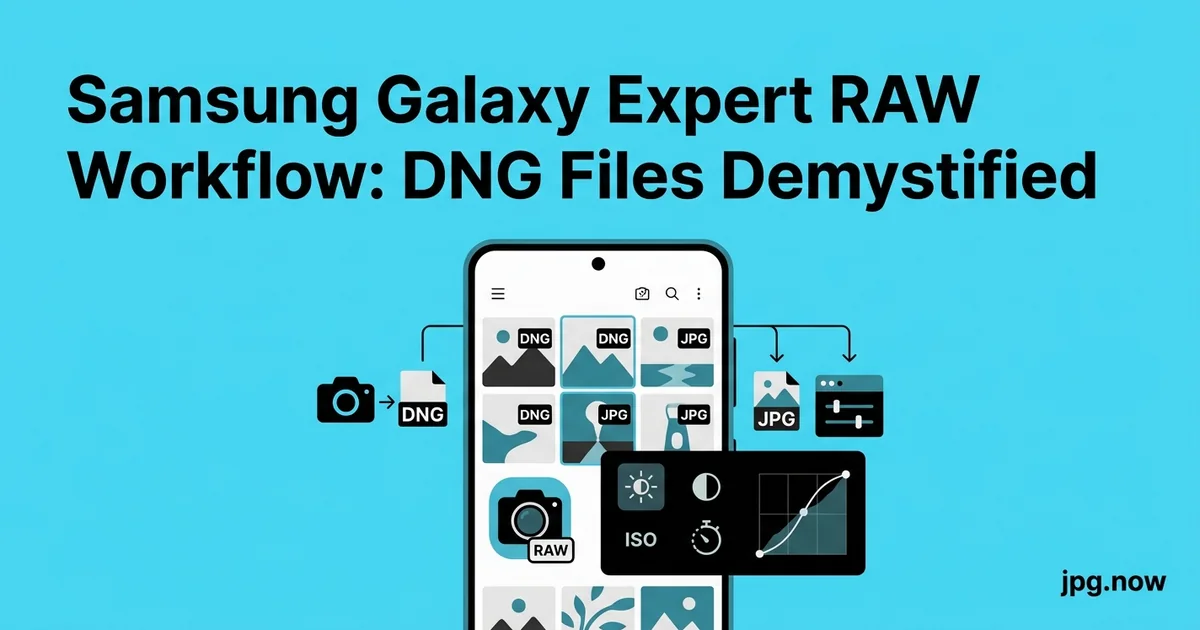
A landscape photographer I know spent his first Iceland trip shooting nothing but Samsung Expert RAW. He came home with 1,212 DNG files totaling 58 GB on a 256 GB Galaxy S24 Ultra. When he tried to import them into Lightroom Classic, the import dialog reported "File format not supported" on roughly half the files. The cause was not Lightroom; it was that Samsung had updated the Expert RAW container format in a recent app patch and his Adobe Camera Raw was a version behind. He had not realized the DNGs from Expert RAW are not standard sensor RAWs at all. They are computational multi-frame fusion baked into a DNG wrapper, and the wrapper subtly differs from a Pixel ProRAW or a Lumix DC-RAW.
Samsung's Expert RAW app, available free for Galaxy S22 Ultra and later, quietly produces some of the most flexible mobile RAW files on the market. Each press of the shutter writes a 16-bit Adobe DNG that is roughly 40 to 60 MB, alongside a finished JPG in DCIM/Camera. Those DNGs are not standard single-frame RAWs; they are computational multi-frame composites baked into a DNG container, which makes them strange to edit and even stranger to convert. Here is what is actually inside, and how to get clean JPGs out the other side.
Background: How Expert RAW Differs From Traditional RAW
A traditional RAW file from a Canon R5 or Sony A7 IV contains raw sensor data: one number per photosite, before any processing. The image is reconstructed at edit time by your software applying demosaicing, white balance, color matrix transforms, and tone curves. The data has high dynamic range (14+ stops on full-frame sensors) and full editing latitude.
An Expert RAW DNG is different. The Galaxy's image signal processor captures a burst (5 to 12 frames depending on light), aligns them, averages the lowest-noise pixels per location, applies lens correction and chromatic-aberration removal, and writes the result to a DNG. The output has higher per-pixel quality than any single-frame capture would produce, but the multi-frame fusion already locked in some processing decisions (motion handling, noise treatment) that you cannot undo later.
What Expert RAW Actually Captures
When you press the shutter in Expert RAW on a Galaxy S24 Ultra, the phone captures up to 12 frames at the selected ISO, aligns them, fuses the lowest-noise pixels, and writes the result into a DNG with 14 stops of dynamic range. The DNG looks like a flat, low-contrast image when you first open it in Lightroom or Snapseed, because Samsung has stripped its in-camera tone curve to give you maximum recovery latitude. Highlights that look blown out in the camera JPG are typically recoverable in DNG with 2 to 3 stops of pull.
The file size is the surprise. A standard Sony A7 IV ARW file is 50 MB. A Samsung Expert RAW DNG of the same scene is 45 to 55 MB despite coming from a much smaller sensor. The reason is the multi-frame fusion: the DNG embeds more bits per pixel than a single-shot RAW. Plan for that when you fill your microSD card.
Step-by-Step: From Galaxy DNG to Delivered JPG
- Verify the file with metadata. Drop one DNG into image info and confirm "Samsung" in the make field and "S24 Ultra" (or your model) in the camera field. The software field shows "Expert RAW" or "Multi-Frame".
- Backup to external storage. Copy the DCIM/Expert RAW folder to a USB-C SSD before any editing. 1 TB drives are around $80 in 2026.
- Update Lightroom Mobile. Lightroom recognizes Expert RAW DNGs natively if you are on the current version. Older app versions refuse to import.
- Import a representative selection. Bring 20 to 50 DNGs into Lightroom Mobile rather than all at once. Editing performance degrades sharply past 100 files in a mobile session.
- Apply baseline edits. Contrast +20, vibrance +15, highlights -25, shadows +35 as a starting point. Adjust to taste.
- Export at delivery resolution. JPG quality 85 for web, quality 92 for print, sRGB profile for both unless your printer specifies Adobe RGB.
- Run web-tier through compress JPG. Hit a specific target file size for marketplace listings or social media.
- Archive the DNG. Keep DNGs for hero shots only. Delete the bulk after the JPG is delivered and confirmed.
Converting Galaxy DNG to JPG
The fastest path for one-off conversions is our DNG to JPG converter, which understands the Samsung tone curve and applies a reasonable default contrast and saturation pass so the output does not look flat. A typical Expert RAW DNG converts to a 4 to 6 MB JPG at quality 90, suitable for printing or sharing. For a batch of 50 to 100 DNGs from a day's shoot, the browser-based tool processes them in groups of 10 to 20 without uploading the files anywhere.
If you shoot DNG on multiple devices (Pixel, iPhone ProRAW, Galaxy), the more general RAW to JPG tool handles all of them with format-specific defaults. The Samsung profile is automatically detected from the EXIF make and model.
Editing Before Conversion: Lightroom Mobile
For meaningful edits, open the DNG in Lightroom Mobile (free tier handles DNG fully). The histogram will land in the middle third with no clipping in either direction, which is the goal Samsung's processing aims for. Start with +20 contrast, +15 vibrance, and pull highlights -25 and shadows +35. That gets you to roughly the look of the in-camera JPG with all the recovery latitude intact.
From there, export at full resolution with sRGB profile and quality 85. The resulting JPG will be 3 to 5 MB and indistinguishable from a high-end mirrorless export for web use.
Print-Ready Versus Web-Ready Output
For print, you want the maximum resolution from the DNG (typically 12,000 x 9,000 from a 108 MP S24 Ultra in high-res mode) at quality 92 with sRGB or Adobe RGB profile embedded. File size lands around 18 to 25 MB. Most professional labs accept JPGs up to 50 MB, so you have headroom.
For web, downsample to 2048 pixels on the long edge and use quality 80. A Samsung Expert RAW shot prepped for web will be about 480 to 720 KB. Running it through compress JPG after Lightroom export gives you fine control if you need to hit a specific file size cap for a CMS or marketplace.
Common Mistakes and the Fix
- Mistake: Treating Expert RAW like single-frame RAW. Fix: Understand that motion is already locked in. A moving subject during the burst leaves ghosting that cannot be removed in post.
- Mistake: Shooting Expert RAW for everything. Fix: Daylight portraits and even-light landscapes look as good or better as in-camera JPG. Use Expert RAW only when you need recovery latitude.
- Mistake: Letting Galaxy storage fill up mid-shoot. Fix: Carry a USB-C microSD reader. Offload every 200 to 300 frames.
- Mistake: Editing on the phone screen and missing color shifts. Fix: Tag a few hero shots and finish them on a calibrated external display before final delivery.
- Mistake: Comparing the DNG-derived JPG to the in-camera JPG and assuming DNG always wins. Fix: Use compare to verify the DNG version is actually better for your specific scene.
- Mistake: Confusing Galaxy "RAW" (single-frame) with Expert RAW (multi-frame). Fix: Galaxy's standard Pro mode RAW is single-frame and behaves like traditional RAW. Expert RAW is the multi-frame computational version.
Real-World Examples
Example 1: The Real-Estate Lister. Adwoa shoots 30 to 50 interiors per week on a Galaxy S24 Ultra. She uses Expert RAW only for tricky window light (interior dim, window bright). The latitude pulls window detail back without blowing interior exposure. Her listings convert faster than her competitors' because the windows show actual views.
Example 2: The Travel Vlogger. Patrik captures stills between video segments. Expert RAW for sunsets, JPG for everything else. His Galaxy storage stays manageable and his Instagram feed has the dynamic range his audience expects.
Example 3: The Tech Reviewer. Lina compares smartphone cameras professionally. She uses Expert RAW + JPG side-by-side captures to show readers exactly how much the computational pipeline adds. Her review process leans heavily on compare for side-by-side rendering.
Expert RAW vs Standard JPG Output
| Aspect | Standard JPG | Expert RAW DNG |
|---|---|---|
| File size | 5 to 9 MB | 40 to 60 MB |
| Dynamic range | ~10 stops | ~14 stops |
| Editing latitude (highlights) | 1 stop recoverable | 3 stops recoverable |
| Editing latitude (shadows) | 2 stops lift | 5+ stops lift, low noise |
| Motion handling | Single-frame, no ghosting | Ghosting if subject moved |
| Out-of-camera look | Punchy, saturated | Flat, requires edit |
| Best for | Daylight, even light | HDR, low light, mixed WB |
Inspecting What You Got
One of the most useful steps in any RAW workflow is verifying that the file actually contains what you think it does. Drop your DNG or exported JPG into image info to see exposure, focal length, ISO, white balance, lens model, and embedded color profile. For Expert RAW files you will see "Samsung" in the make field and the specific Galaxy model in the camera field, plus a "Samsung RAW Multi-Frame" indicator in the software field. That is how you know you have a real multi-frame file and not a single-shot DNG from another app.
The Storage Calculus
At 50 MB per file, Expert RAW fills storage fast. A 256 GB Galaxy with 100 GB of other apps and media has space for roughly 3,000 DNGs. A typical wedding shooter producing 800 keepers per event will fill that in a long weekend. Three strategies help:
- Shoot JPG + DNG only when you need recovery latitude (high contrast, mixed lighting). Shoot JPG only for casual scenes.
- Offload to a USB-C SSD nightly. Samsung T7 Shield 2TB drives are around $130 and write at 800 MB/s over USB-C.
- Convert and archive the JPG, keep the DNG only for hero shots. Use DNG to JPG in batches to make a quick contact sheet of every file.
Advanced Tips
- Use the Expert RAW manual focus peaking. The app overlays a colored highlight on in-focus areas. Critical for ensuring sharpness on fast-moving subjects where you can't trust autofocus.
- Enable RAW histogram before exposing. The standard camera histogram reflects the JPG tone curve, which can mislead. The Expert RAW histogram shows the actual sensor data.
- Switch to 50 MP main sensor in Expert RAW. The 200 MP mode pixel-bins to 12 MP by default for Expert RAW; manually choose 50 MP for hero shots if you want more detail.
- Pair with DPI converter for print-ready output. Set the JPG metadata to 300 DPI before sending to a print lab.
- For social media, use JPG to WebP. A high-quality Expert RAW JPG converts to WebP at half the file size with no visible loss.
- Calibrate the Galaxy display. Settings then Display then Screen Mode. Set to "Natural" instead of "Vivid" for color-accurate editing.
- Build a Lightroom preset specifically for Expert RAW. Save your baseline edits as a preset and one-tap apply to every new DNG.
When Expert RAW Is Worth It
Not every shot benefits from DNG. Daylight portraits, landscape vistas in even light, and most product shots look as good or better straight from the JPG processing pipeline because Samsung's tone curve has been heavily tuned. The DNG is worth the storage cost when you have high dynamic range (sunsets, backlit subjects, deep shadows next to direct sun), tricky white balance (mixed indoor and window light), or when you need to push the file in post.
For everything else, the camera JPG at quality 97 is already excellent. You can confirm this for any specific scene by comparing the in-camera JPG against your DNG-derived JPG in compare, which lays them side by side with synced zoom.
Frequently Asked Questions
Why is Expert RAW slower to capture than standard mode?
The multi-frame burst takes 1 to 2 seconds and processing adds another 2 to 4 seconds. You cannot fire bursts in Expert RAW. Use standard mode for action.
Can I edit Expert RAW DNGs in Snapseed?
Yes, Snapseed supports DNG natively. Editing latitude is more limited than Lightroom but acceptable for casual work.
Do Expert RAW files include lens correction?
Yes. Lens distortion and chromatic aberration are corrected before the DNG is written. You cannot disable this.
Will the in-camera JPG always match my edited DNG output?
Rarely. Samsung's in-camera processing applies aggressive sharpening and saturation that is hard to replicate exactly. The DNG export is generally cleaner.
Can I shoot Expert RAW on the ultrawide and telephoto lenses?
Yes on S23 Ultra and S24 Ultra. The lens selection works the same as standard mode.
How does Expert RAW handle long exposures?
Expert RAW supports up to 30-second shutter speeds. The multi-frame fusion is disabled for exposures over 1 second; the result is a single-frame DNG.
What about Galaxy S25 Ultra changes?
S25 Ultra produces similar Expert RAW files with slightly improved noise handling. Workflow is identical.
Quick Reference Numbers
Samsung Expert RAW DNG: 40 to 60 MB. Editing latitude: roughly 14 stops. Time to convert one DNG in DNG to JPG on a mid-tier laptop: 1.2 seconds. Output JPG at quality 85, full resolution: 4 to 6 MB. Output JPG at quality 80, downsampled to 2048: 480 to 720 KB.
The Galaxy S25 Ultra and What Changed
Samsung's 2025 flagship refined Expert RAW with a few notable changes worth knowing if you upgraded. The fusion stack now uses up to 16 frames in low light (versus 12 on S24 Ultra) for cleaner shadow detail. The DNG container includes new metadata fields for the per-pixel confidence map, which Adobe Lightroom uses to suppress noise reduction in areas the camera deemed already clean. File sizes grew slightly, with typical DNGs landing at 45 to 65 MB versus 40 to 60 on S24 Ultra.
The practical implications: shadow lifting is even more forgiving on S25 Ultra, and the in-camera JPG looks closer to the DNG out of the box because Samsung dialed back the heavy sharpening pass. If you previously avoided Expert RAW because the in-camera JPG was good enough, give the new pipeline another look; the gap has narrowed.
How Expert RAW Compares to Other Mobile RAW Pipelines
If you have shot Apple ProRAW or Google Pixel RAW, the Samsung approach feels familiar but distinct. ProRAW captures up to 12 frames and merges them with Apple's Deep Fusion pipeline, producing a flatter file than the JPG but with somewhat tighter latitude than Samsung. Pixel RAW captures fewer frames (5 to 15 depending on HDR+ mode) with aggressive noise reduction that bakes in. Samsung sits between the two on noise handling and ahead of both on highlight recovery.
For multi-platform shooters, the practical implication is that your edit baselines need to differ by device. Samsung DNGs want +25 contrast and -25 highlights as a baseline. Pixel DNGs want +25 contrast and -15 highlights (less recovery available). ProRAW wants +20 contrast and -20 highlights. Building three separate Lightroom presets for these three sources eliminates 80 percent of the back-and-forth in mixed-device edits.
Workflow For Galaxy Owners Without a Computer
If the Galaxy is your only device, the workflow runs entirely on phone. Capture in Expert RAW, edit in Lightroom Mobile or Snapseed (both handle DNG natively), export JPG at desired quality, run through compress JPG in Chrome on the same phone for final sizing, share. Total time per delivered image: roughly 2 to 4 minutes including the edit. The phone's local processing handles all of it without uploading to any external service.
Start with the DNG to JPG converter for your existing Expert RAW files, then layer in compress JPG for delivery sizing and image info for metadata verification. For mixed-format shoots that include CR3 or ARW alongside DNG, the general RAW to JPG tool handles everything in one batch. All run in your browser.