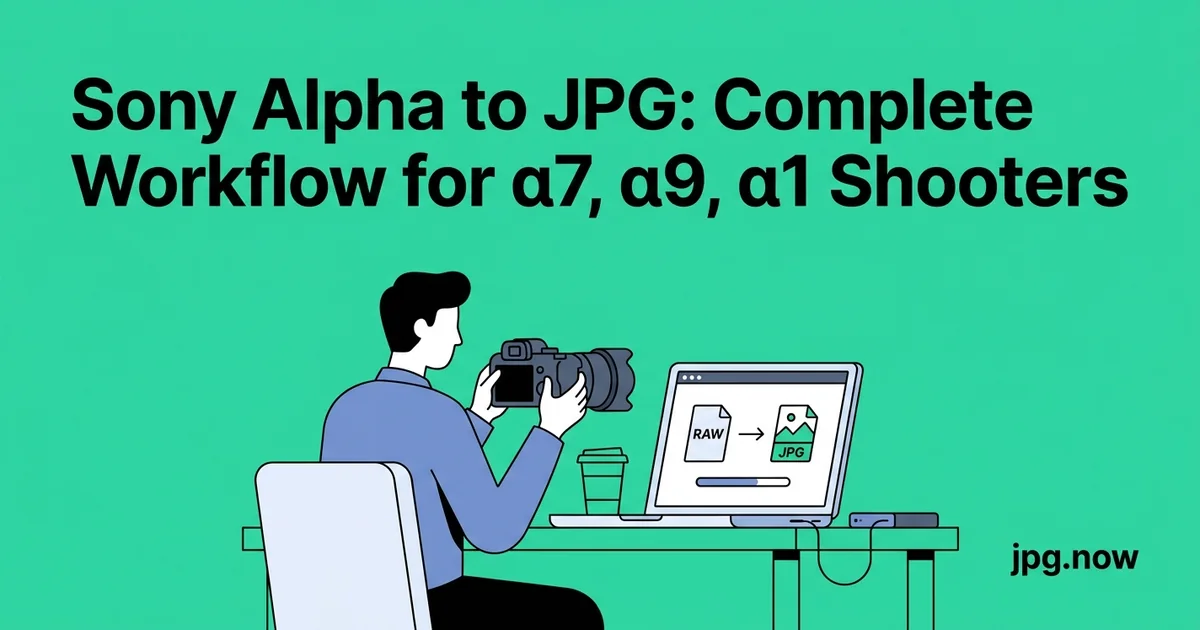
Sony Alpha to JPG: Complete Workflow for α7, α9, α1 Shooters
You pulled the card from your Sony a7 IV, dropped the ARW files onto your laptop, and immediately discovered that Windows Photos shows a generic gray box, Instagram refuses the upload, and the client portal you use to deliver previews wants JPG only. Sony's ARW raw format is technically well-documented, but the practical reality in 2026 is that maybe half of the consumer tools your clients use can read it. The client cannot open the proof set, the wedding planner cannot drop a teaser into their newsletter, and the magazine editor who asked for a sample frame is staring at a broken icon.
This guide is the working photographer's shortest path from a Sony Alpha sensor to a deliverable JPG, covering the a7-series, a9-series, and the high-resolution a1 bodies. It assumes you already know how to shoot — what is missing is a deliberate post-capture pipeline that turns 64 GB of ARW into a tight, fast, universally readable gallery without losing the color science that made you buy Sony in the first place.
Background: why ARW exists and why it breaks delivery
ARW is an excellent capture format. A single uncompressed a7R V file pushes 120 MB and holds roughly 14 stops of dynamic range, which is exactly why you shot raw in the first place. Sony's sensor data sits in the file alongside camera metadata, embedded thumbnail, and the picture profile that the in-body engine used to render the back-of-camera preview. For editing purposes, ARW is rich, flexible, and absolutely worth the storage.
The trouble starts the moment the file leaves your editing software. Email gateways at corporate clients reject anything above 25 MB. Squarespace, Wix, and most CMS uploaders will not accept the extension at all. Even Adobe Bridge takes three to five seconds per file to render a usable preview at full resolution. WhatsApp, Slack, and most messaging platforms refuse the format outright. Your bride wants to text her mother the first-look frame and discovers the file simply does not attach. The answer is not to abandon ARW, it is to treat conversion as a deliberate step in your workflow rather than an afterthought.
Path 1: Imaging Edge Desktop for Sony-native color
Sony's own Imaging Edge Desktop suite is free and produces JPGs that match the colour profile your camera applied in-body. If you have ever loved a Sony JPG straight out of camera and wondered why your Lightroom export looks slightly off, the answer is the in-body picture profile is not perfectly emulated by third-party converters. Imaging Edge re-creates it because Sony wrote both the camera firmware and the desktop software, and they share the same colour-rendering pipeline.
Open the Viewer module, batch-select your ARW files, choose Develop, and export to JPG at quality 95 with sRGB. The catch is throughput. Imaging Edge is slow, single-threaded for most operations, and will take 30 to 45 minutes to chew through 500 frames on a 2024 MacBook Pro. Reserve this path for hero shots and portfolio work where colour fidelity is worth more than time. For a wedding gallery of 800 frames it is the wrong tool; for a 40-frame product portfolio it is the right one.
Path 2: Capture One for high-volume professional work
Capture One's Sony-specific profiles are the closest you will get to Imaging Edge colour with proper editing-grade speed. The Sony version is licensed at a lower price than the universal Pro version and supports every Alpha body Sony has shipped. A batch export of 1,000 a7 IV ARWs to 3,000-pixel JPG takes about 18 minutes on an M3 Pro, roughly four times faster than Imaging Edge, with GPU acceleration on supported hardware cutting another 20 percent off that.
Set your export recipe to JPG, quality 90, sRGB, long edge 3,000 pixels for web delivery or full resolution for print. Capture One also writes accurate EXIF and embeds your copyright string if you fill in the metadata template once. The session-based file management Capture One uses is also genuinely faster than Lightroom's catalog model for sports and event shooters who burn through cards and never want files indexed forever.
Path 3: Browser conversion for one-off urgency
You are at a coffee shop on a borrowed laptop and the client wants the engagement teaser in two hours. You do not have Capture One on this machine. This is the scenario the ARW to JPG converter exists for. Upload, convert, download, deliver. The output is a sensible default JPG at quality 90 with embedded ICC profile, and it works the same on Windows, macOS, ChromeOS, and an iPad.
For multi-format shoots where a second shooter handed you a card with mixed ARW, NEF, and CR3 files, the broader RAW to JPG converter handles everything in one upload. There is no per-format toggle to set. Files are detected and routed automatically.
Step-by-step walkthrough: ARW to deliverable in seven steps
- Ingest twice, never once. Copy ARWs to your working drive and an immediate backup drive before reformatting the card. If anything goes wrong in the next steps you can recover from the backup without reshooting.
- Pre-cull in Photo Mechanic or Sony Imaging Edge. Reject obvious failures (eyes shut, motion blur, focus miss) before any conversion work. This single pass cuts downstream effort by 30 to 50 percent.
- Open survivors in Capture One or Lightroom and apply a Sony-camera profile. Calibration panel, Camera Standard or whichever picture style you shot. Skip this step and your global colour drift is locked in.
- Synchronize white balance and exposure across scene blocks. Pick a reference frame from each lighting condition (golden hour outside, indoor ceremony, reception lighting) and sync the rest. You will spend per-image time only on hero portraits.
- Export at two tiers. Print tier: full resolution, sRGB, quality 95. Web tier: 3,000 px long edge, sRGB, quality 90. Both with copyright EXIF embedded.
- Compress the web tier through compress-jpg. A 30 to 40 percent size reduction with no visible quality loss. Your client gallery upload runs in a third of the time.
- Audit a random sample before delivery. Open ten random files from the export folder in Preview, check focus, colour, and file size. Catch the one bad export now, not after the client emails.
- Archive ARWs to cold storage. Backblaze B2, Wasabi, or a second physical drive. Reformat the card last.
Settings that match the in-body JPG engine
Sony's Standard Creative Style applies a specific tone curve, saturation bump, and sharpening pass. To replicate it in your converter of choice, start with these baseline numbers:
- Contrast: +10 from neutral
- Saturation: +8
- Sharpening amount: 40, radius 1.0, detail 25
- Noise reduction luminance: 15 for ISO under 3200, 35 for ISO 6400 and above
- White balance: as-shot, then nudge +200K if the scene reads cool
Wedding shooters using the a1 or a9 III often need a slightly warmer base to match skin tones the way Sony's in-body engine does. Add a +5 magenta tint to compensate for the slight green cast common to Alpha sensors under LED venue lighting.
Handling lossless compressed versus uncompressed ARW
Sony bodies offer three ARW flavors: uncompressed, lossless compressed, and compressed. The newer a7R V and a1 II support a true lossless compressed mode that cuts file size roughly in half with no quality penalty. Older a7 III and a9 II only offer uncompressed or lossy compressed.
| Format | Body | Typical size (a7R V, 61 MP) | Convert speed | When to use |
|---|---|---|---|---|
| Uncompressed | All | 120 MB | Slowest | Studio, controlled light |
| Lossless compressed | a7R V, a1, a9 III, a7 IV | 60 MB | Fastest | Everyday pro work |
| Compressed (lossy) | All | 30 MB | Fast | Sports, high frame counts |
If you shoot uncompressed for hero work and lossless compressed for everything else, your converter handles both transparently. There is no quality difference in the resulting JPG from a lossless compressed source.
Common mistakes and how to avoid them
- Exporting in Adobe RGB by default. Diagnosis: skin tones look correct on your calibrated monitor but desaturated on Instagram. Fix: switch every export preset to sRGB. Save Adobe RGB exports only for print labs that specifically request the wider gamut.
- Forgetting lens corrections. Diagnosis: visible vignette in upper corners or chromatic aberration along high-contrast edges. Fix: enable Profile Corrections in Lightroom Develop, or check the equivalent toggle in Capture One. Third-party Sigma and Tamron lenses need their profiles applied manually.
- Trusting the embedded thumbnail. Diagnosis: the back-of-camera preview looked perfect but your exported JPG has different colour. Fix: the thumbnail used the in-body picture profile. Always preview the converted file at 100 percent before delivery — never trust the embedded JPG.
- Culling after conversion instead of before. Diagnosis: spending 40 minutes per 100 frames culling a giant export folder. Fix: cull the ARWs first in Photo Mechanic, only convert keepers. Saves 60 to 75 percent of total post time.
- Single-pass sharpening at default. Diagnosis: skin looks slightly plastic, fine fabric texture is smeared. Fix: drop sharpening amount to 30 with masking 50 for portraits, push to 60 with masking 30 for landscape detail.
- Ignoring metadata. Diagnosis: client receives 600 files named DSC_0001 through DSC_0600. Fix: batch-rename on export to ClientLast_YYYYMMDD_001 format and embed copyright + contact in IPTC.
Real-world examples
Eliza, wedding photographer, San Diego. Shoots a7 IV plus a9 III backup. 1,200 frames per wedding, 800 delivered. Imaging Edge for the 30-frame hero portrait set going to the album designer, Capture One for the gallery, browser-based ARW to JPG conversion when she is on her travel laptop during destination weddings. Total weekly volume: 4 weddings, 4,800 frames, 3,200 delivered JPGs.
Marcus, sports stringer, covers high school football for a regional paper. Shoots a9 III on Friday night, files due to the paper by 11 PM. Uses lossy compressed ARW for buffer speed, batches through Capture One with a pre-built export recipe set to long edge 2,400 px and quality 85. Editor needs files under 1 MB each. Workflow ingest to delivery: 90 minutes for 800 frames culled to 60 keepers.
Studio commercial team, Berlin. Shoots a7R V uncompressed in tethered Capture One sessions. Client approves on a colour-managed monitor in the studio, then the files export at full 60-megapixel JPG quality 95 sRGB for layout and quality 100 Adobe RGB for the print lab. Two recipes, one button each, every shoot delivered the same day.
Advanced tips
- Use Sony's Lens Compensation menu in-camera. Distortion, shading, and chromatic aberration corrections happen at capture and embed in the ARW. Your converter applies them automatically. Saves a step at export.
- Build separate export presets for sneak peeks versus full gallery. Sneak peeks: 1,920 px long edge, quality 80, watermark applied. Full gallery: 3,000 px, quality 90, no watermark. One click, two outputs.
- Tether for studio. Imaging Edge tethers Sony bodies natively over USB-C. Frames land on the laptop as you shoot, ARW + embedded JPG. Client sees results in real time.
- Use the focus magnifier in Capture One for cull pass. 400 percent zoom keystroke lets you check eye sharpness in burst sequences in under a second per frame.
- For mixed-card workflows, batch-rename on import. Photo Mechanic and Capture One both rename on ingest. Sequential numbering across cards prevents collisions.
- Strip GPS EXIF before publishing portraits. Privacy and stalker risk. Most exporters have a checkbox.
- Calibrate your monitor. A SpyderX or i1Display Pro pays for itself in saved reprints within a year of professional work.
FAQ
Can I open ARW files without any Sony software?
Yes. Lightroom, Capture One, Affinity Photo, DxO PhotoLab, and the browser-based ARW to JPG converter all read ARW natively. You only need Imaging Edge if you specifically want Sony's in-body colour rendering replicated exactly.
What is the difference between ARW and ARQ?
ARW is the standard Sony raw. ARQ is the pixel-shift multi-frame composite produced by a7R IV, a7R V, and a1 bodies. ARQ files are larger and read by fewer tools. For ARQ-specific conversion, use Imaging Edge — third-party support is uneven.
Do I need to convert to JPG before uploading to my gallery host?
Yes for almost every gallery host. Pixieset, Pic-Time, ShootProof, Pass Gallery, and Smugmug all accept JPG and reject ARW. Convert before upload.
Why does my exported JPG look different from the back-of-camera preview?
The camera preview uses the in-body picture profile (Standard, Portrait, Vivid, etc.). Your editor uses a different colour profile by default. Apply the matching Camera profile in your editor's Calibration panel.
What is the right JPG quality setting?
Quality 90 for client galleries, 95 for print, 80 for social. Above 95 the file grows with no visible improvement. Below 75 visible blocking starts on detail areas.
Can I batch-convert ARW to JPG without opening a desktop app?
Yes. The ARW to JPG converter accepts multi-file uploads, processes them in parallel, and returns a zipped JPG batch.
What about the new lossless compressed ARW from the a1 II?
Fully supported by every major editor since late 2024 firmware. There is no conversion penalty versus uncompressed. Output JPG is identical.
Tool comparison: where each Sony path wins and loses
| Tool | Strength | Weakness | Best for | Speed (500 ARWs) |
|---|---|---|---|---|
| Imaging Edge Desktop | Exact Sony colour science | Slow, dated UI | Hero / portfolio | 30-45 min |
| Capture One (Sony) | Pro speed + colour fidelity | Subscription cost | High volume pro | 15-18 min |
| Lightroom Classic | Universal raw support, AI features | Approximate Sony colour | Mixed-camera workflows | 18-22 min |
| DxO PhotoLab | Best-in-class noise reduction | Slower batch ops | High-ISO sports | 25-30 min |
| arw-to-jpg browser | No install, any device | No develop control | Field / emergency | 10-15 min |
| raw-to-jpg universal | Handles mixed formats | No body-specific tuning | Multi-shooter trips | 12-18 min |
Tethered shooting with Sony bodies
If you shoot commercial, product, or studio portrait work, tethering changes everything. Imaging Edge Desktop's Remote module connects over USB-C to every Alpha body shipped since 2018. Frames land on the laptop within 1-2 seconds of capture, ARW + embedded JPG preview. Capture One Sony tethers natively with full live-view and exposure control. The advantage on a paid shoot is client confidence — the art director sees results as they happen and approves on a colour-managed monitor rather than peering at a 3-inch camera screen.
The tethering workflow folds neatly into the conversion pipeline: capture goes to a tethered folder, Capture One processes it with the recipe you built for the session, JPG outputs land in a separate "approved" folder the client can browse on their iPad. For a fashion or product shoot, this is the difference between a half-day session and a same-day delivery.
Archiving ARW for the long term
Sony shooters generate substantial volume. A working pro produces 200 to 500 GB of ARW per quarter. Long-term archive strategy matters because storage costs compound and retrievability matters when an old client comes back two years later for a reprint.
Three-tier archive that working pros use:
- Hot tier: last 90 days on internal SSD or fast network storage. Edit-ready, instant access.
- Warm tier: 90 days to 18 months on external HDD or NAS. Slower access but online.
- Cold tier: beyond 18 months on Backblaze B2, Wasabi, or Glacier Deep Archive. Cents per GB-month.
Always keep at least one JPG export of every delivered gallery in the hot tier. When a client emails in 2031 asking for "that one frame from our 2026 wedding," you can find it without restoring 800 GB of ARW from cold storage.
Pick your path and deliver
For portfolio and gallery work, route through Capture One. For one-off urgency or borrowed-laptop scenarios, the ARW to JPG converter gets you there in under a minute per file. For massive multi-shooter projects, treat the RAW to JPG tool as your safety net. Once you have JPGs in hand, run them through compress-jpg and you are ready to deliver. For deeper resolution planning, the image file size calculator tells you what an export of a given dimension will weigh before you build the recipe. And if you need to push through PNG, WebP, or PDF intermediates for specific clients, jpg-to-png, jpg-to-webp, and jpg-to-pdf close the loop. For batch-prep across all the major tools jpg.now offers, browse /tools.