
Image Format Conversion for Social Media, Web, and Print Projects
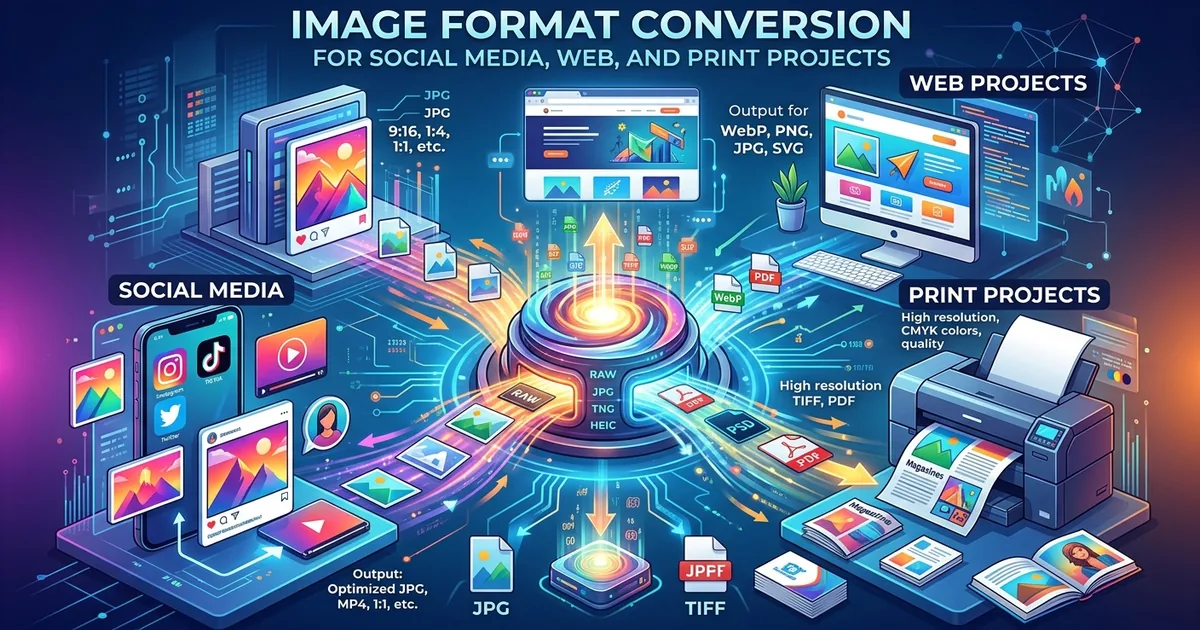
Your photo looks perfect on your phone screen. Then you upload it to a website and it turns blurry. You send it to a print shop and they ask for a 300 DPI file. You post it to Instagram and the platform recompresses it into something flat and dull. The image did not change. The format did not match the job. That is the whole problem, and it is more fixable than most people think.
Format choices directly shape how your image looks, loads, and prints in every publishing context.
- Social media platforms cap file sizes and recompress uploads, so starting with the right format and resolution matters before you hit publish.
- Web images need lightweight, sRGB-tagged files, while print files require high resolution and CMYK color, making them nearly opposite in structure.
- A free browser-based tool lets you switch formats instantly, with no software to install and no account to create.
Why Format Choice Affects the Final Result
Image formats are not interchangeable containers. Each one makes different trade-offs. JPEG compresses aggressively and is great for photos, but it introduces artifacts if you compress it repeatedly. PNG keeps every pixel intact but produces larger files. WebP gives you the best of both worlds for screens, but not every platform accepts it. TIFF holds large amounts of data for print work but is completely overkill for a social post.
The publishing destination sets the rules. Social platforms have upload caps measured in megabytes and pixel dimensions. Websites penalize slow load times, so every extra kilobyte matters. Print shops need files with enough data to hold detail at 300 dots per inch. One image, three completely different requirements.
Social Media Uploads: Specs That Actually Matter
Each platform behaves differently with images. Facebook, Instagram, LinkedIn, X, and Pinterest all recompress what you upload. If your file is already compressed, that second pass makes it worse. Starting with a clean, high-quality source file gives the platform more to work with and reduces the visible damage from their processing.
These are the specs worth knowing across the major platforms:
- Instagram feed images: 1080px wide is the display maximum. JPEG is preferred. Keep files under 8MB. Square (1:1), portrait (4:5), and landscape (1.91:1) ratios are all safe choices.
- Facebook: Shared images compress to 2048px on the long edge. PNG uploads hold detail better for graphics with text. Photos do better as JPEG when pre-optimized under 100KB.
- X (formerly Twitter): Accepts JPEG, PNG, GIF, and WebP. The recommended size for landscape posts is 1600x900px. Photos must stay under 5MB.
- LinkedIn: Post images display at up to 1200x627px. JPEG and PNG both work. Keep the file under 5MB for reliable uploads.
- Pinterest: Vertical images perform best at a 2:3 ratio. A 1000x1500px target is solid. PNG or JPEG both upload without issue.
One habit that saves headaches: export at the platform's recommended resolution rather than uploading a massive original. That reduces how aggressively the platform needs to compress your file, and the result looks noticeably better.
Web Optimization: Keeping Images Fast Without Losing Quality
Website performance is tied directly to image file size. A page that loads slowly loses visitors fast. Search engines also use page speed as a ranking signal, so large, unoptimized images can quietly hurt your visibility in search results.
Color profile matters here too. Screens work in RGB color. Files tagged with CMYK profiles can look shifted or dull in a browser. Always export web images in sRGB. Most photo editing tools default to this, but it is worth checking, especially if you ever switch between print and web projects in the same session.
For format, WebP is now widely supported by modern browsers and typically cuts file size by 25 to 35 percent compared to JPEG at the same visual quality. PNG is better for images with transparency or hard edges, like logos or interface graphics. JPEG still works well for photos where a transparent background is not needed.
Resolution for screens sits at 72 to 96 PPI. There is no benefit to uploading a 300 DPI image to a website. The browser renders at screen resolution regardless, so a high-DPI file just adds weight without improving how the image looks.
Print-Ready Files: Where Higher Standards Apply
Print is where format decisions carry the most consequence. Printing physically reproduces colors using ink, not light. That means the color model shifts from RGB, which mixes light, to CMYK, which mixes ink pigments. An image that looks vivid on screen can print duller if it is not converted to CMYK before the file goes to the printer.
Resolution is the other major factor. Screens display at 72 to 96 PPI. Commercial print requires 300 DPI for sharp output. At anything lower, text looks soft and photo detail breaks down at the edges. Large-format prints like trade show banners can sometimes go down to 150 DPI, because viewers stand farther back, but standard commercial print work needs the full 300.
The color profile standards set by the International Color Consortium define how color is described and transferred between devices. When your print shop asks for an ICC profile-tagged file, they want the printer to interpret your colors accurately. For most print jobs, attaching an industry-standard CMYK profile like US Web Coated (SWOP) v2 gives you consistent, predictable output.
Format choices for print typically come down to TIFF or PDF. TIFF is lossless, preserves layer data if needed, and is widely accepted by print suppliers. PDF is preferred when you are including bleeds, crop marks, and embedded fonts for designed documents. JPEG can work for simple photos going to a standard print lab, but avoid it for professional commercial work where image quality cannot be compromised.
Converting Between Formats Without Installing Software
Not everyone has Photoshop or a subscription to a professional editing suite. Even those who do sometimes need a faster way to switch formats on a machine that does not have their main tools installed, or when a client sends a file in the wrong format at the last minute.
A browser-based image converter handles this without any download or account setup. You upload your file, choose the output format, and download the result. It runs from any device and takes a fraction of the time a software install would require.
This kind of tool is especially useful when you receive files in one format and need to deliver them in another. A client sends a PNG and your print shop needs a TIFF. A designer hands off a WebP and your CMS only accepts JPEG. The conversion takes seconds and does not require any technical knowledge to pull off.
A Repeatable Workflow for Each Publishing Context
Building a short decision sequence for each context saves you from format errors at submission. Follow these steps each time you prepare an image for a specific destination:
- Identify the destination first. Is this going to a social media post, a web page, or a print shop? The answer determines everything else.
- Check the resolution requirement. Social and web images need 72 to 96 PPI. Standard print images need 300 DPI. Large-format print can go down to 150 DPI depending on viewing distance.
- Set the correct color profile. Use sRGB for anything displayed on a screen. Use CMYK for anything going to a commercial printer.
- Choose your format. JPEG for web photos and social uploads. PNG for graphics with transparency or hard edges. WebP for web performance gains. TIFF or PDF for professional print work.
- Confirm the file size cap. Social platforms enforce upload limits. Web pages need lightweight files. Print files can be large, but some upload portals for print services have their own size ceilings.
- Convert if needed. If your file is in the wrong format, switch it before submitting, not after you get a rejection message.
- Review a preview when possible. For print work, always request a digital proof before approving a full print run. Color and detail issues are much cheaper to catch before the ink hits the paper.
This sequence keeps you from discovering problems after you have already submitted the file and the deadline has passed.
The Quiet Mistakes That Cause Resubmissions
Most format errors are not dramatic. They are quiet. You upload a PNG to social media and wonder why it looks flat. You send a JPEG to a print shop at 96 DPI and get a call asking for a proper file. You hand off a CMYK image to a web developer and they report the colors look off in the browser.
None of these are hard to prevent once you understand the logic. The screen versus print distinction covers most cases on its own. If people are viewing the image on a device, use sRGB and a screen-appropriate format. If a machine is pressing ink onto paper, use CMYK and a lossless or near-lossless format at 300 DPI.
File naming can also trip people up. Saving a TIFF and renaming it with a .jpg extension does not convert the file. The format is determined by the file's internal structure, not its extension. Always run a proper conversion step when you need a different format.
Matching the Format to the Finish Line
Getting images into the right format is not a skill reserved for designers or technical specialists. It is a practical habit that pays off every time you publish, submit, or print. The rules are consistent. They do not change based on the software you use or the subject matter in the photo.
Know your destination. Match the resolution and color profile. Pick the format that fits. Convert what needs converting before the deadline. That four-step habit removes most of the friction from image work, whether you are posting a product shot to Instagram, publishing a hero image on a homepage, or handing off artwork to a commercial printer.
The gap between a file that works and a file that causes problems is almost always a format decision made too late or skipped entirely. Making it earlier in the process, before the upload or the submission, keeps results consistent and revisions minimal.